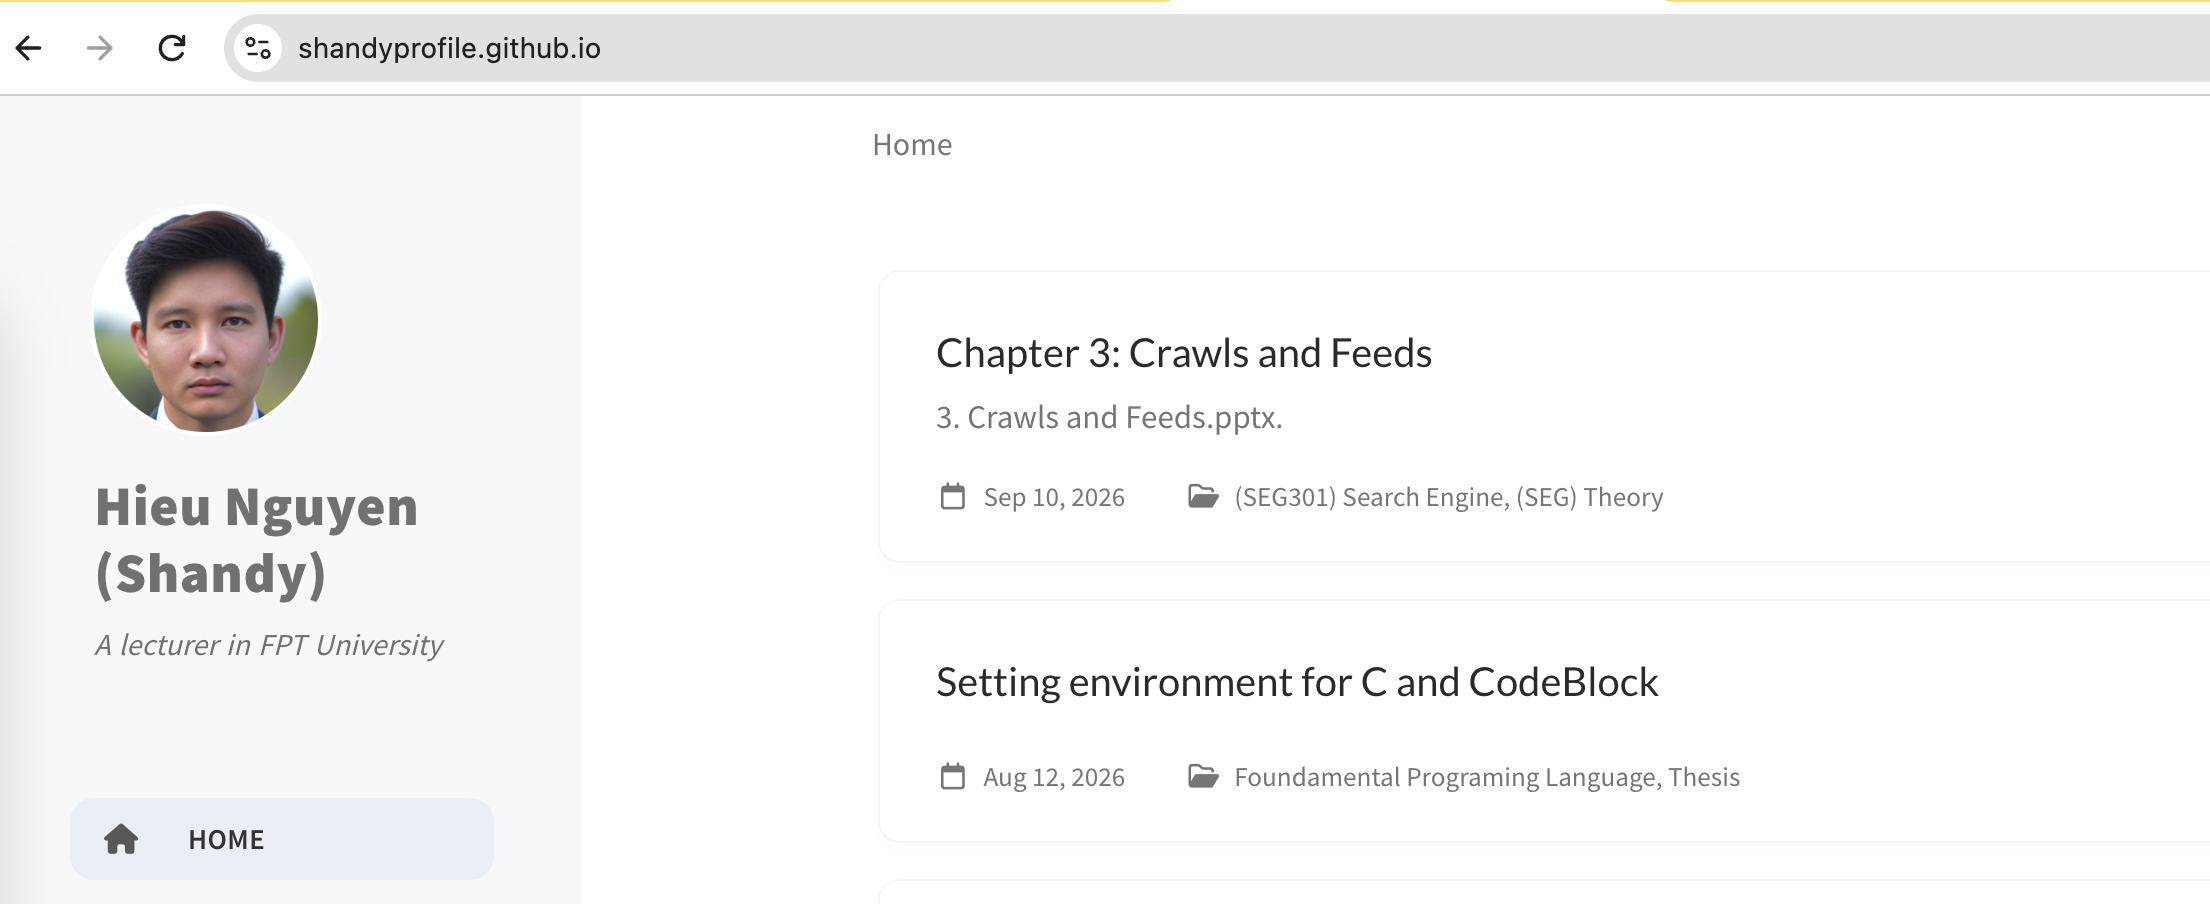
Trong workshop này, bạn sẽ xây dựng một Personal CV Website sử dụng Jekyll và triển khai website lên GitHub Pages.
Thay vì tạo toàn bộ website từ đầu, bạn sẽ sử dụng một Jekyll CV Template có sẵn, sau đó tùy chỉnh nội dung và giao diện theo CV cá nhân.
Quy trình tổng quát:
flowchart TD
    A[Choose a Template] --> B[Clone the Project]
    B --> C[Install Dependencies]
    C --> D[Run Jekyll Locally]
    D --> E[Customize CV]
    E --> F[Customize Template]
    F --> G[Push to GitHub]
    G --> H[GitHub Actions]
    H --> I[GitHub Pages]
    I --> J([Online CV])
Workshop sử dụng các công nghệ sau:
| Technology | Purpose |
|---|---|
| Ruby | Runtime cho Jekyll |
| Jekyll | Static Site Generator |
| Liquid | Template Language |
| YAML | Lưu trữ dữ liệu/configuration |
| HTML | Cấu trúc website |
| CSS | Thiết kế giao diện |
| Git | Version Control |
| GitHub | Source Code Repository |
| GitHub Actions | CI/CD |
| GitHub Pages | Website Hosting |
Ruby là một programming language. Jekyll là một Static Site Generator được xây dựng bằng Ruby.
| Ưu điểm | Giải thích |
|---|---|
| Native với Jekyll | Jekyll được xây dựng bằng Ruby nên Ruby là môi trường chạy trực tiếp của Jekyll. |
| Cài đặt đơn giản | Jekyll được phân phối dưới dạng Ruby Gem, có thể cài đặt bằng gem install jekyll. |
| Gem ecosystem | Có thể sử dụng các Ruby Gem để mở rộng chức năng của Jekyll. |
| Liquid Template | Jekyll sử dụng Liquid để tạo template, kết hợp tốt với cấu trúc Ruby/Jekyll. |
| Markdown + Ruby | Jekyll có thể kết hợp Markdown, Liquid, YAML và Ruby ecosystem trong cùng một project. |
| Plugin mạnh | Có thể sử dụng Jekyll Plugins viết bằng Ruby để mở rộng quá trình build website. |
| Build Static Site | Ruby/Jekyll xử lý nội dung và sinh ra HTML/CSS/JS tĩnh, không cần backend server khi deploy. |
| Phù hợp GitHub Pages | Jekyll có integration rất tốt với GitHub Pages. |
| Configuration bằng YAML | Jekyll sử dụng _config.yml, giúp cấu hình website tương đối rõ ràng. |
| Automation tốt | Ruby ecosystem hỗ trợ tốt các tác vụ build, generate và transform nội dung. |
flowchart TD
    A[Markdown] --> B[Jekyll]

    B --> C[Liquid]
    B --> D[YAML]
    B --> E[Ruby Gems]
    B --> F[Plugins]

    C --> G[HTML / CSS / JavaScript]
    D --> G
    E --> G
    F --> G

    G --> H([Static Website])
Liquid là template language được Jekyll sử dụng để tạo nội dung động từ dữ liệu.
Ví dụ:
1
<h1>{{ site.data.profile.name }}</h1>
Nếu file dữ liệu chứa:
1
name: Nguyen Van A
Jekyll sẽ tạo HTML tương ứng:
1
<h1>Nguyen Van A</h1>
YAML là format thường được sử dụng để lưu configuration và structured data.
Ví dụ:
1
2
3
name: Nguyen Van A
title: Software Engineer
email: nguyenvana@gmail.com
Trong CV project, YAML có thể được sử dụng để lưu:
GitHub Pages là dịch vụ hosting static website của GitHub.
Source code được lưu trên GitHub repository và website được publish thành một URL.
Ví dụ:
1
https://shandyprofile.github.io
GitHub Actions cho phép tự động thực hiện các công việc khi có thay đổi trong repository.
git push => GitHub Actions => Build Jekyll => Deploy => GitHub Pages
Điều này có nghĩa là sau khi bạn cập nhật CV và push code lên GitHub, website có thể được build và deploy tự động.
Trong phần này, bạn sẽ tìm một Jekyll template có sẵn để sử dụng làm nền tảng cho CV.
Bạn không cần xây dựng toàn bộ giao diện từ đầu.
Bạn có thể sử dụng các từ khóa sau:
1
2
3
4
5
6
jekyll cv template
jekyll resume template
jekyll portfolio template
jekyll resume github
jekyll portfolio github
github pages resume
Bạn có thể tìm template trên GitHub hoặc các website cung cấp Jekyll themes.
Trước khi sử dụng một template, hãy kiểm tra:
Một Jekyll project thường có một số thành phần như:
1
2
3
4
5
_config.yml
Gemfile
_layouts/
_includes/
assets/
Nếu repository không có cấu trúc Jekyll hoặc không có hướng dẫn rõ ràng, bạn nên chọn template khác.
Trong workshop, bạn nên sử dụng một template đã được kiểm tra trước để tránh các vấn đề về dependency hoặc GitHub Pages.
Nếu sử dụng template khác, hãy kiểm tra khả năng build local trước khi bắt đầu customize.
Trong phần này, bạn sẽ tìm một Jekyll template miễn phí để sử dụng làm nền tảng xây dựng CV cá nhân.
Thay vì thiết kế toàn bộ website từ đầu, bạn sẽ:
Trang này cung cấp danh sách các Jekyll themes miễn phí được chọn lọc từ cộng đồng open-source.
Truy cập: Jekyll Themes – Free Themes
Trang Free Jekyll Themes hiển thị nhiều template Jekyll miễn phí với thông tin như:
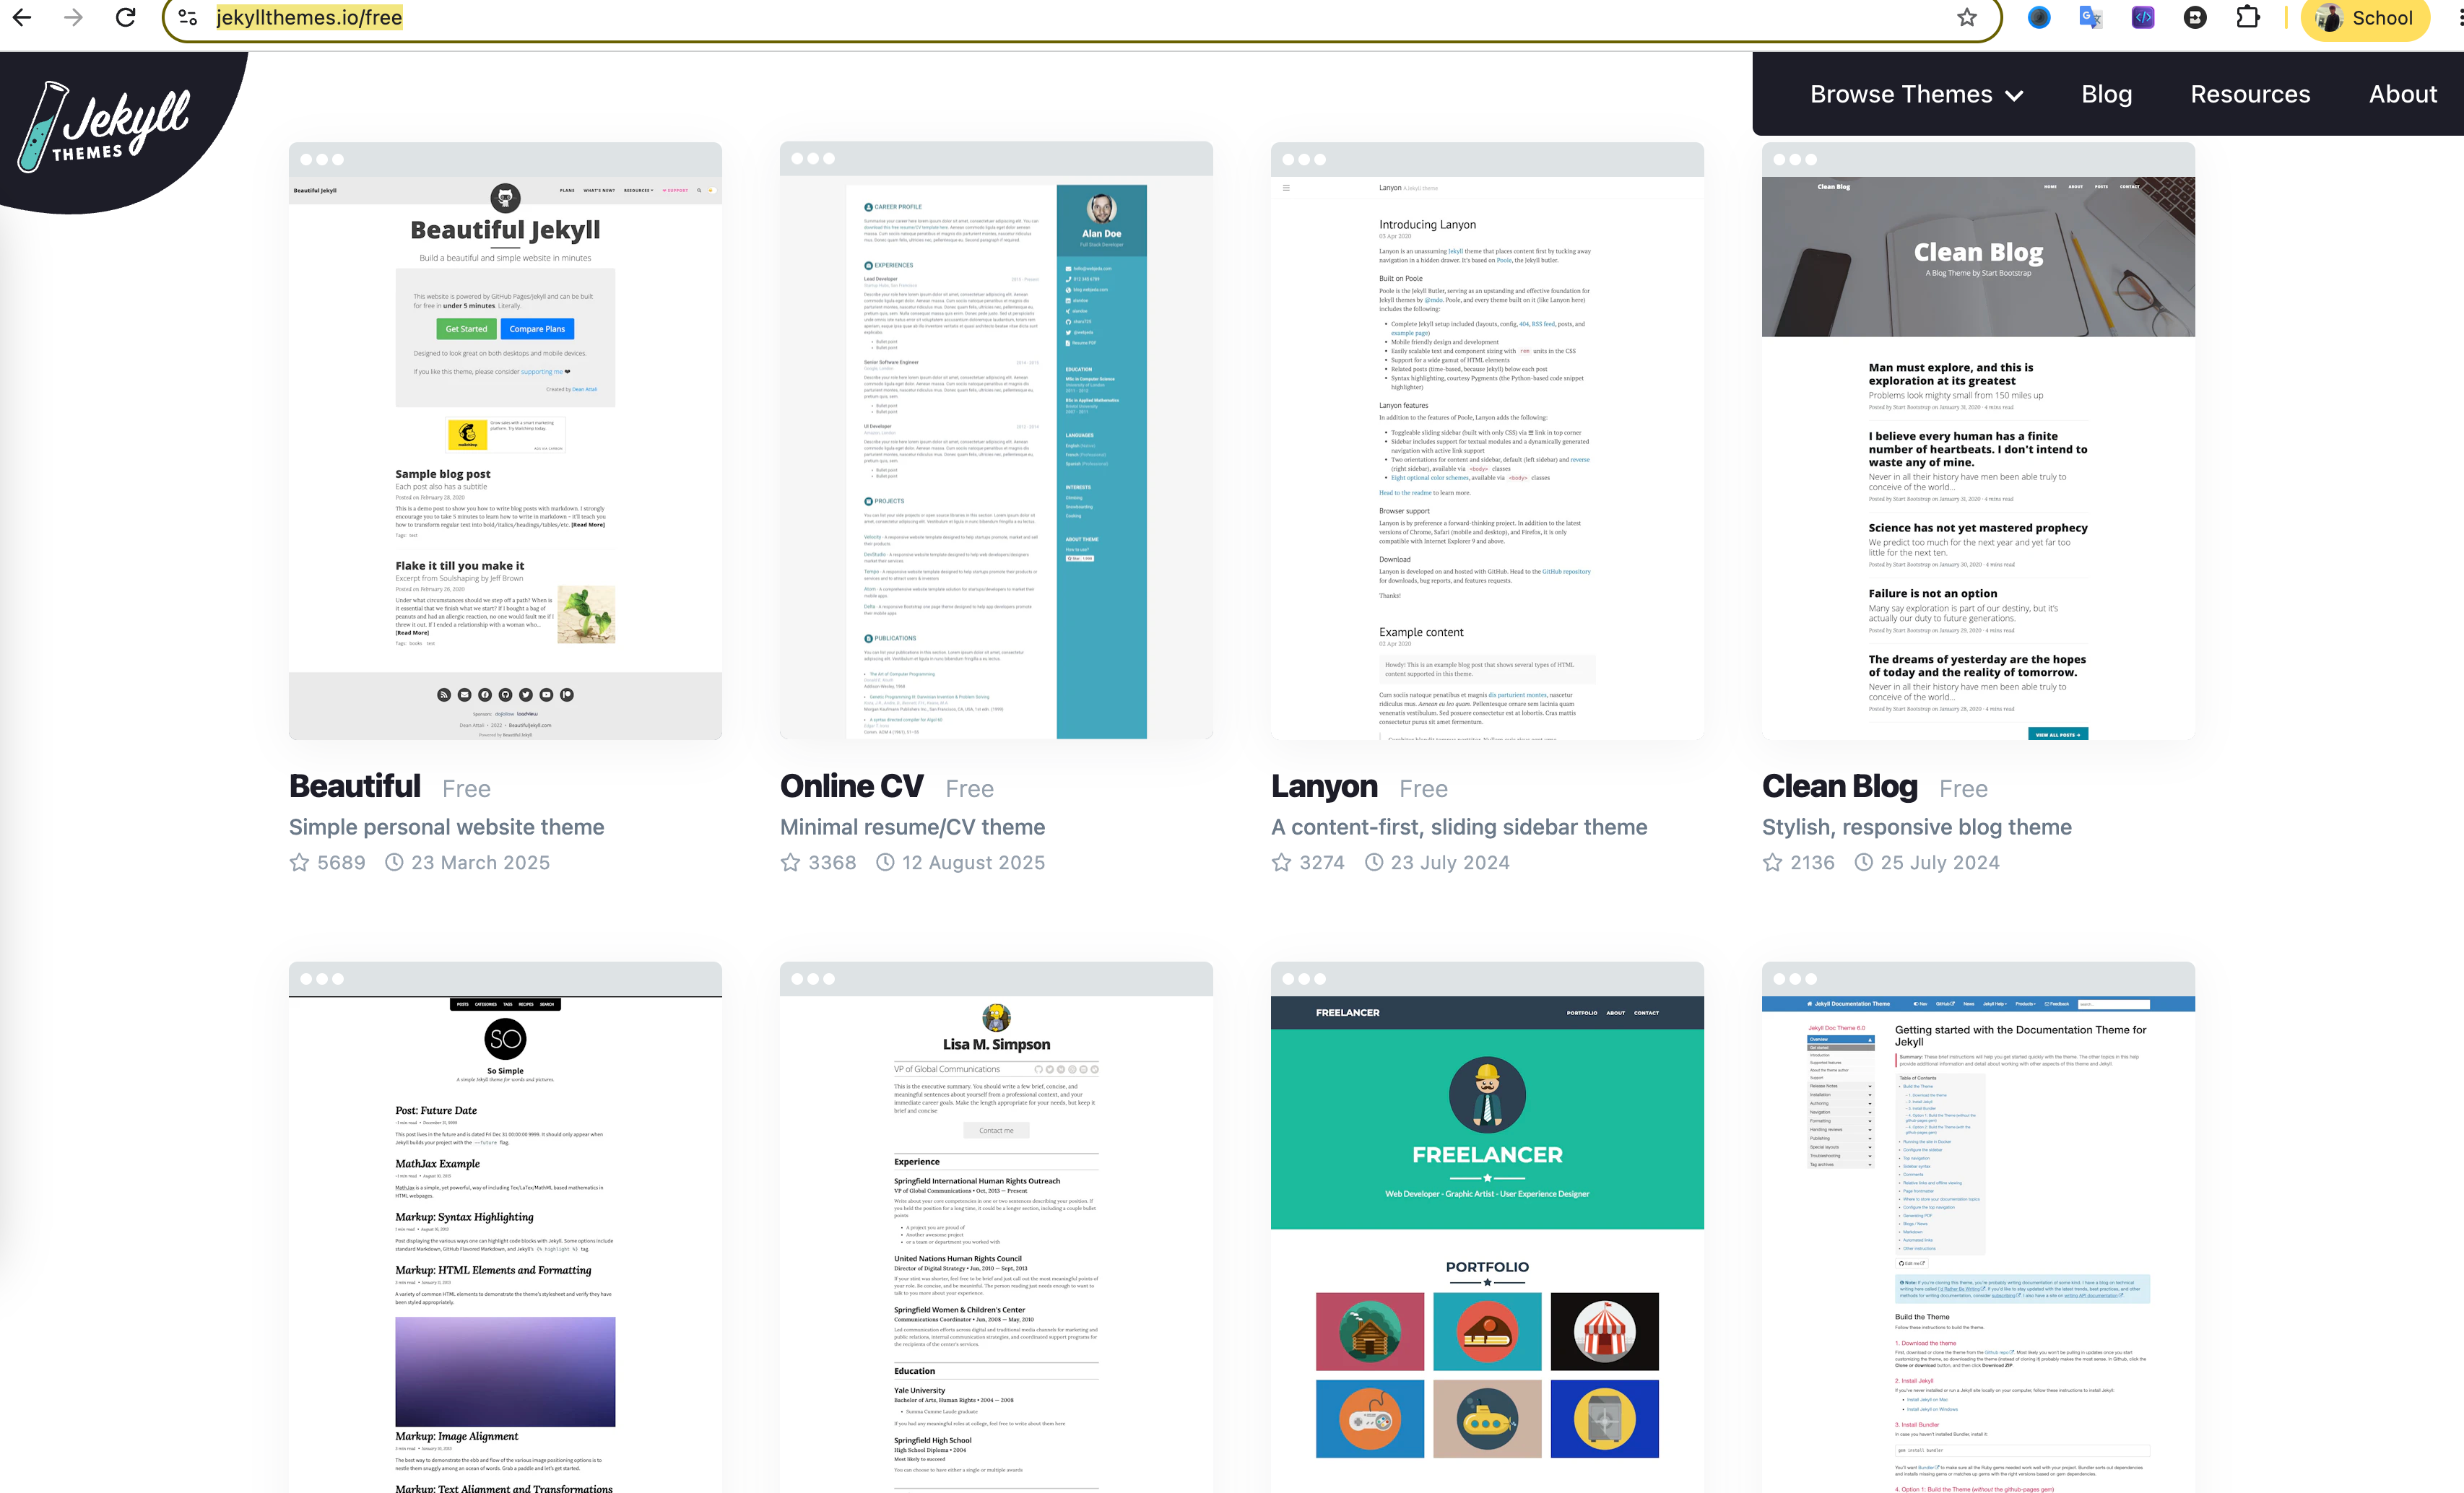
Trang hiện có các theme dành cho nhiều mục đích khác nhau như personal website, portfolio, blog và resume/CV.
Không phải tất cả theme trên trang đều phù hợp để làm CV.
Bạn nên tìm những template có mô tả liên quan đến:
Ví dụ, danh sách Free Jekyll Themes hiện có:
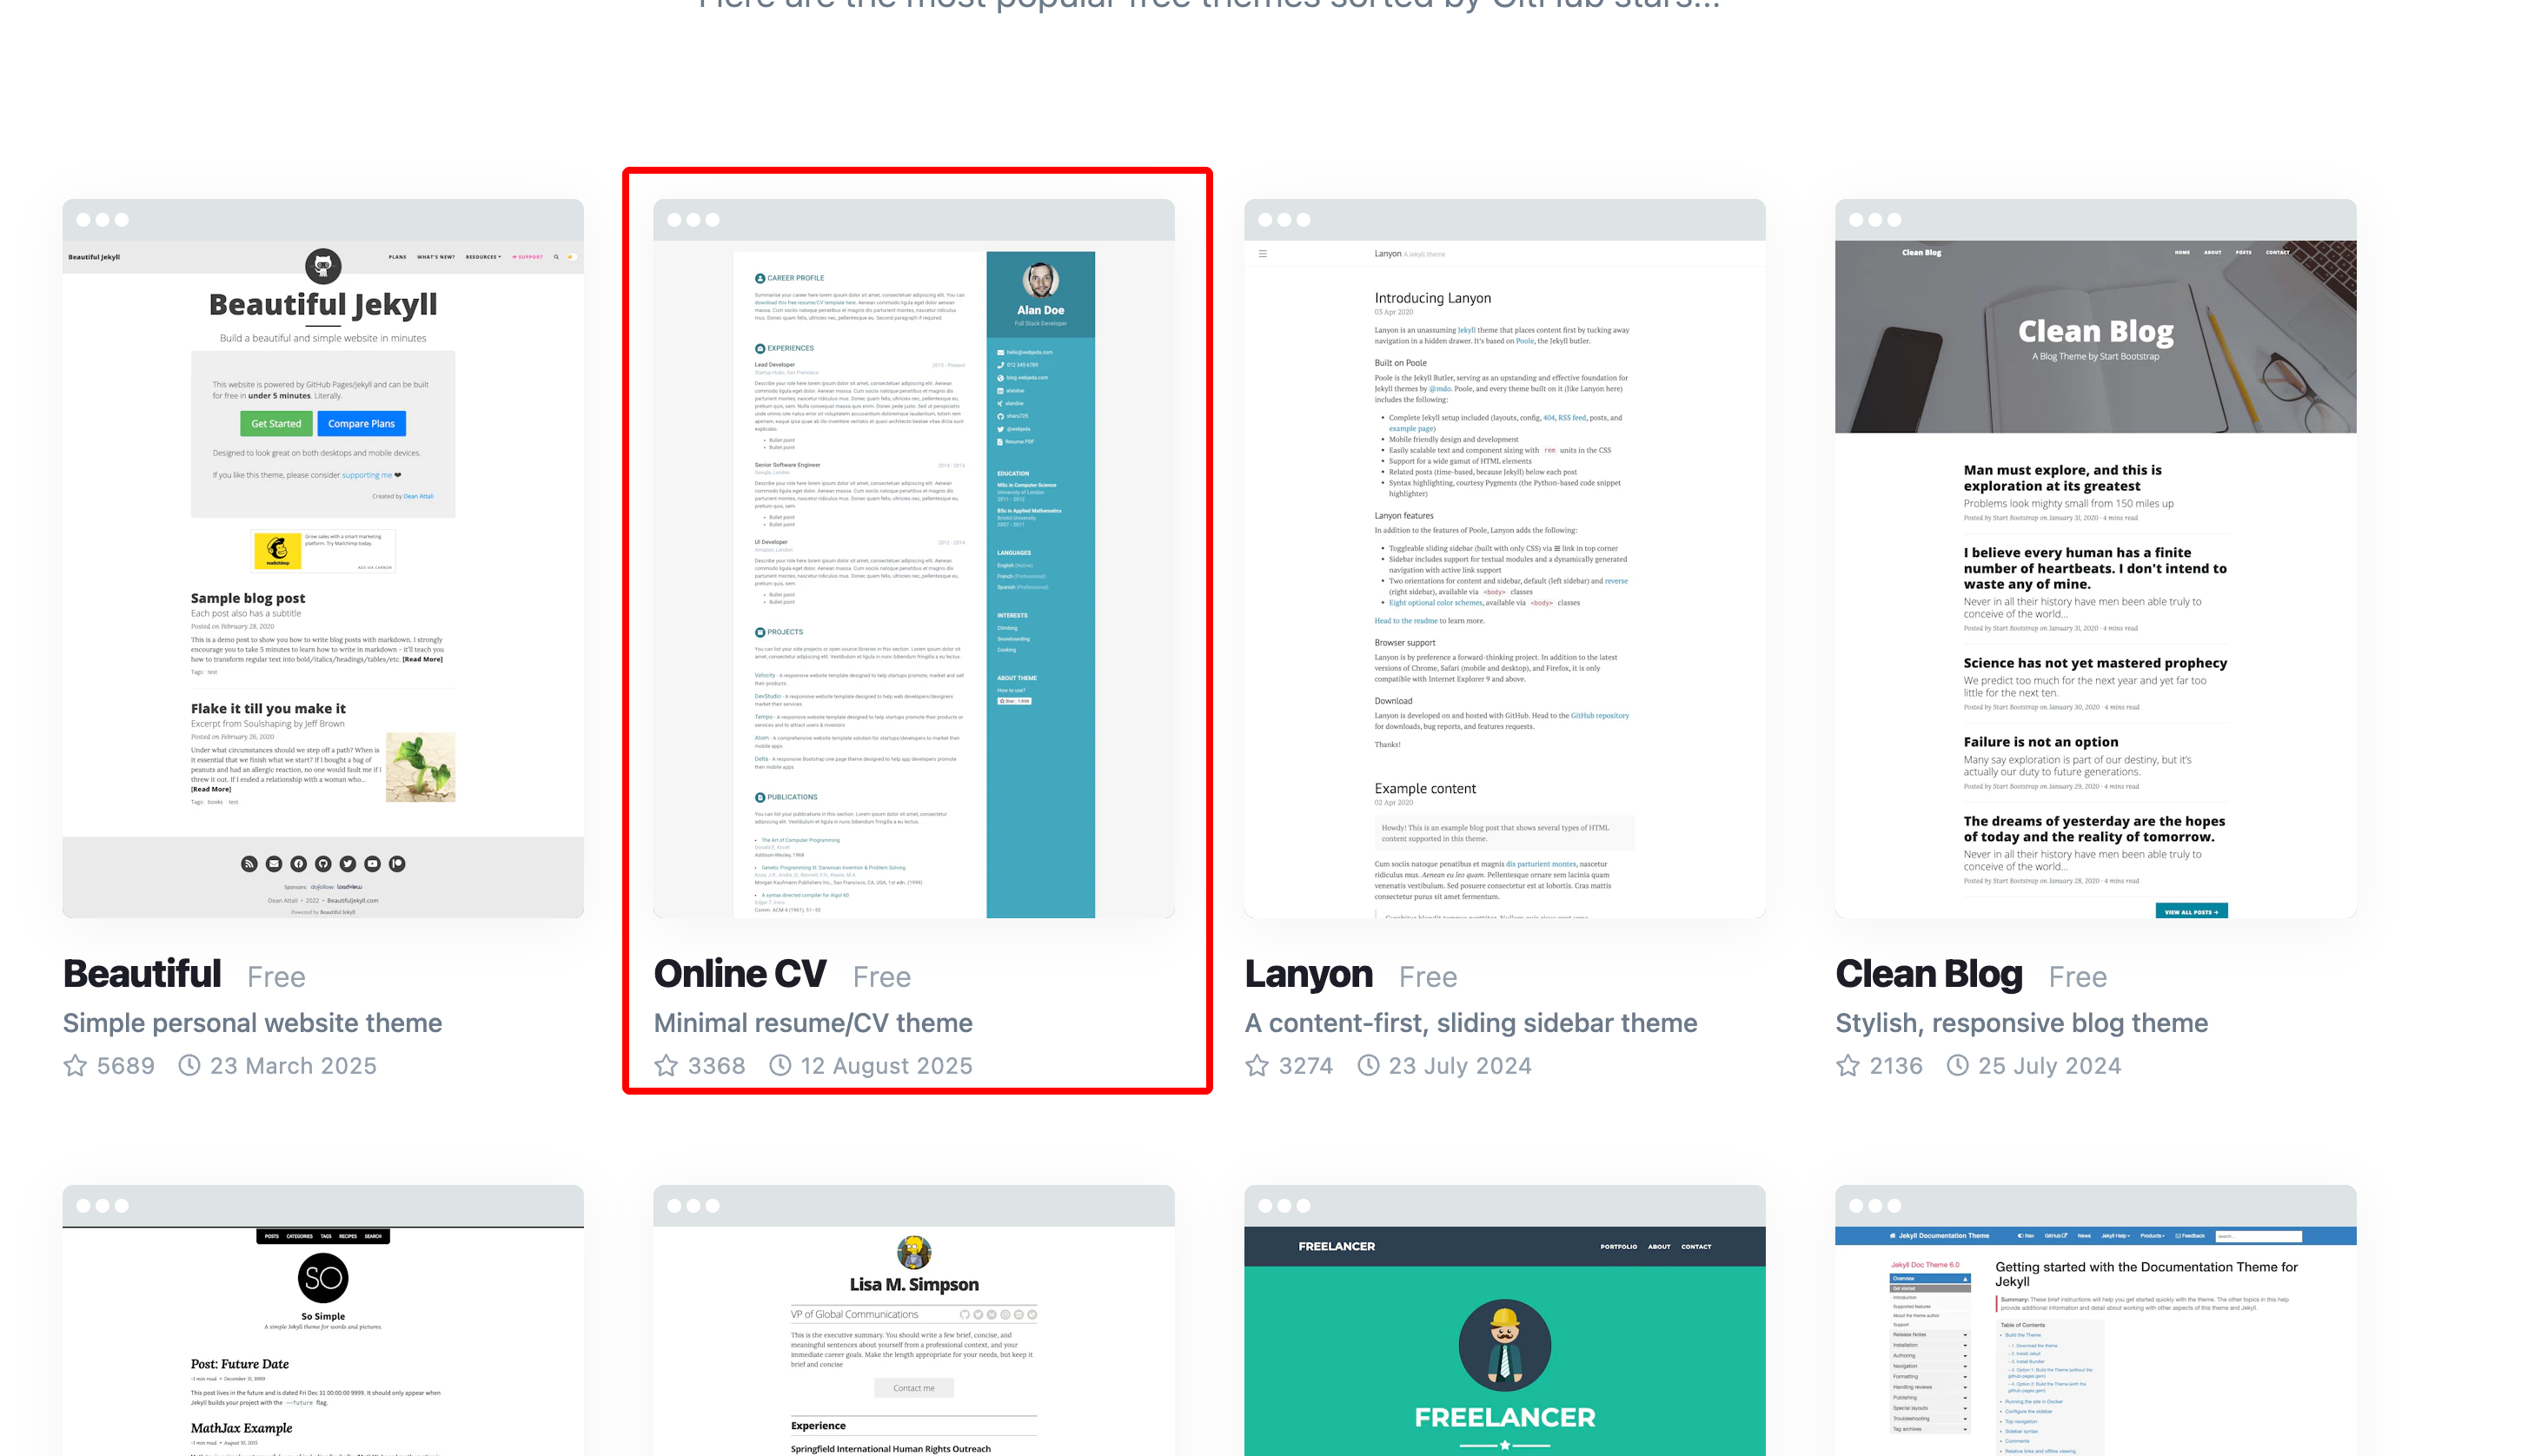
Trong đó Online CV và Resume Template là những lựa chọn trực tiếp hướng đến resume/CV.
Khi tìm thấy một template phù hợp, click vào tên template để mở trang chi tiết.
Ví dụ: Online CV
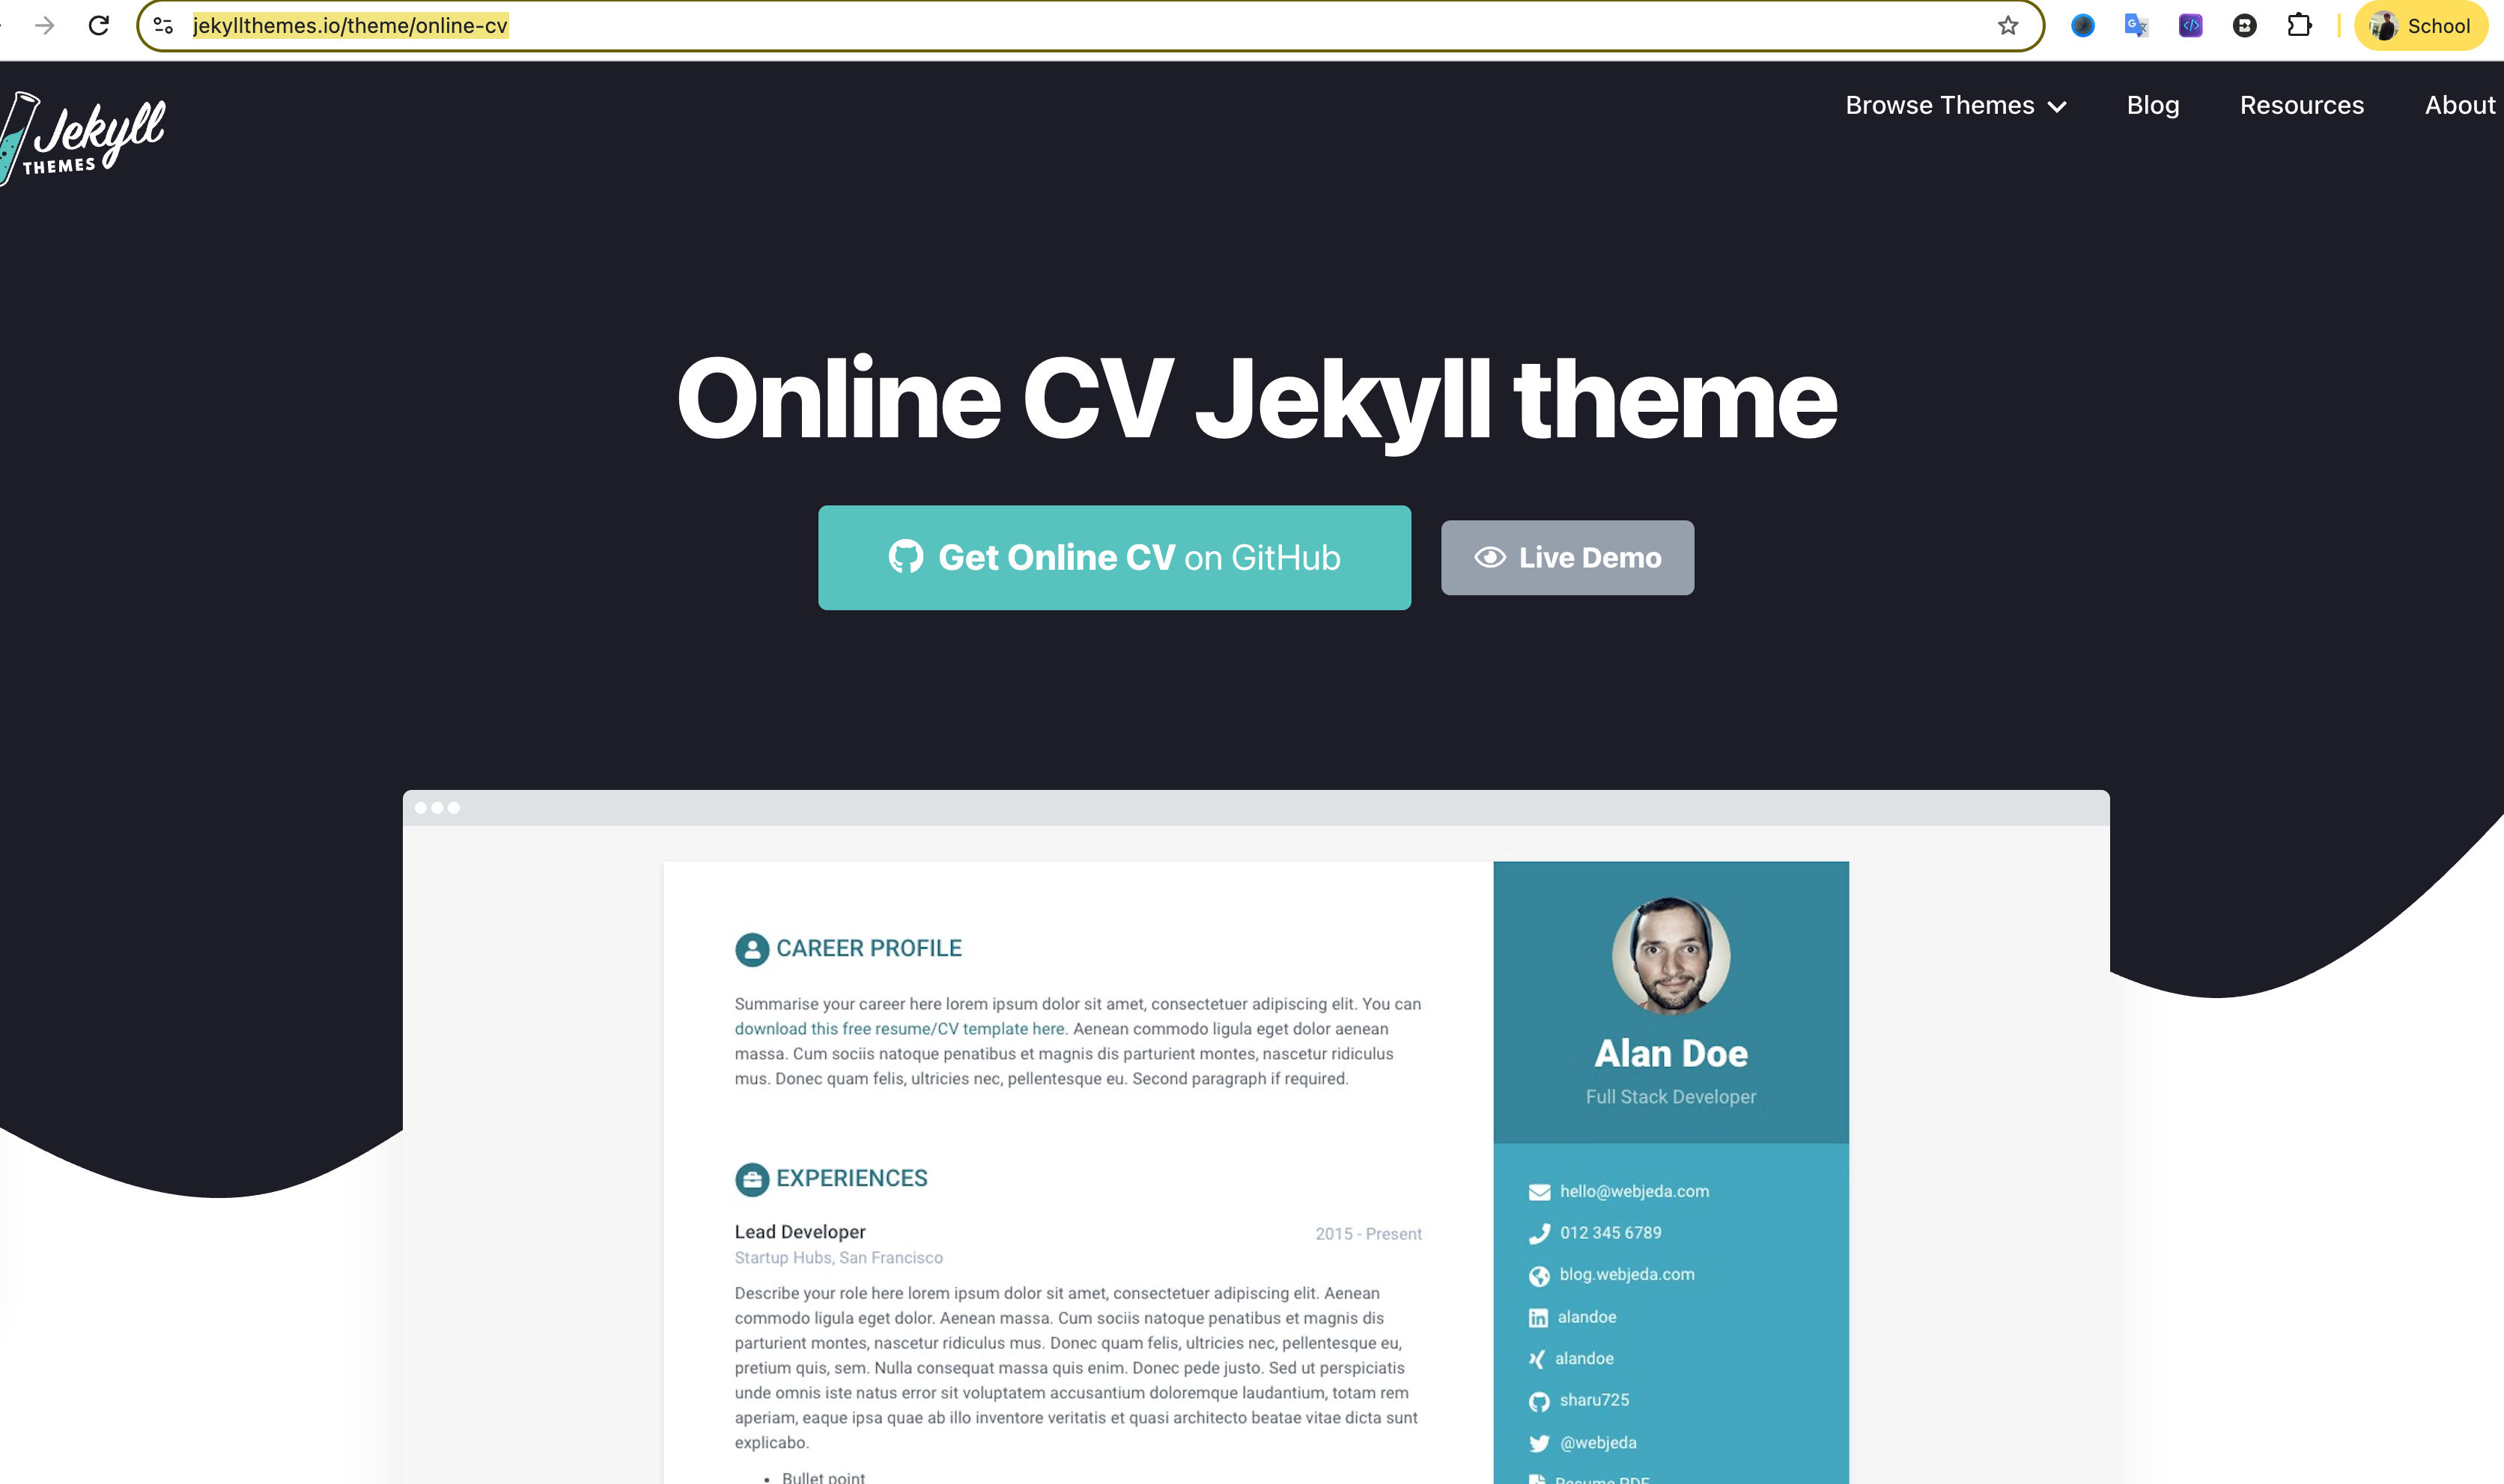
Trang template mô tả đây là một minimal resume/CV theme, có thiết kế responsive và cung cấp nhiều color themes.
Bạn có thể xem:
Trước khi download template, hãy mở Live Demo (https://online-cv.webjeda.com/).
Mục đích là kiểm tra giao diện thực tế.
Bạn nên kiểm tra:
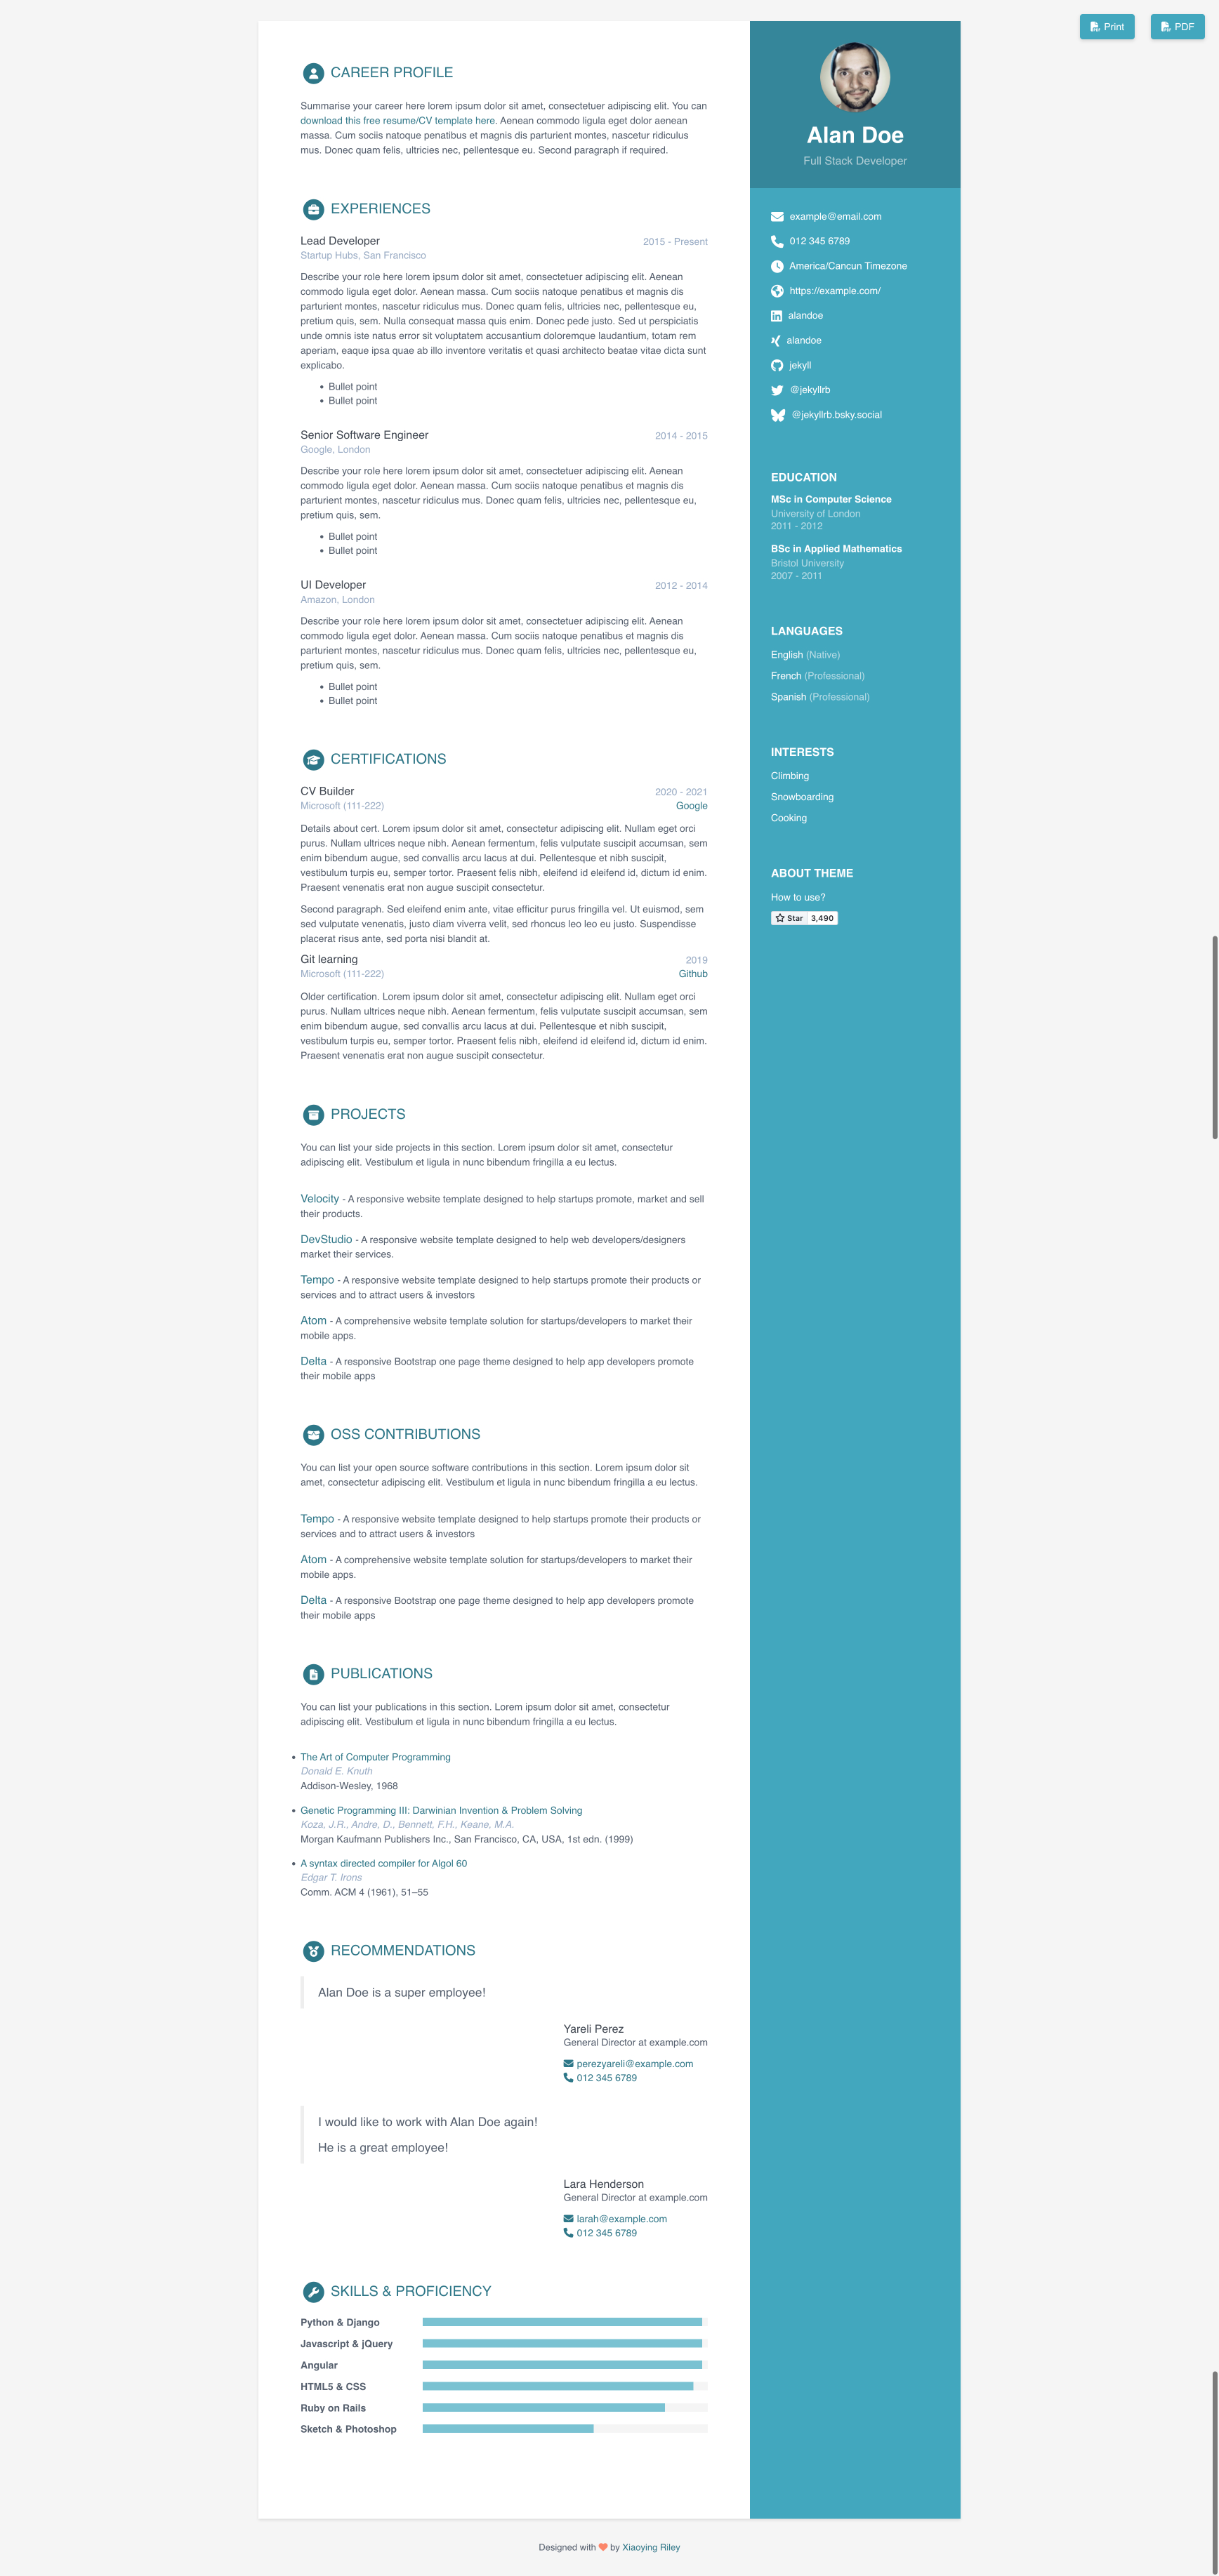
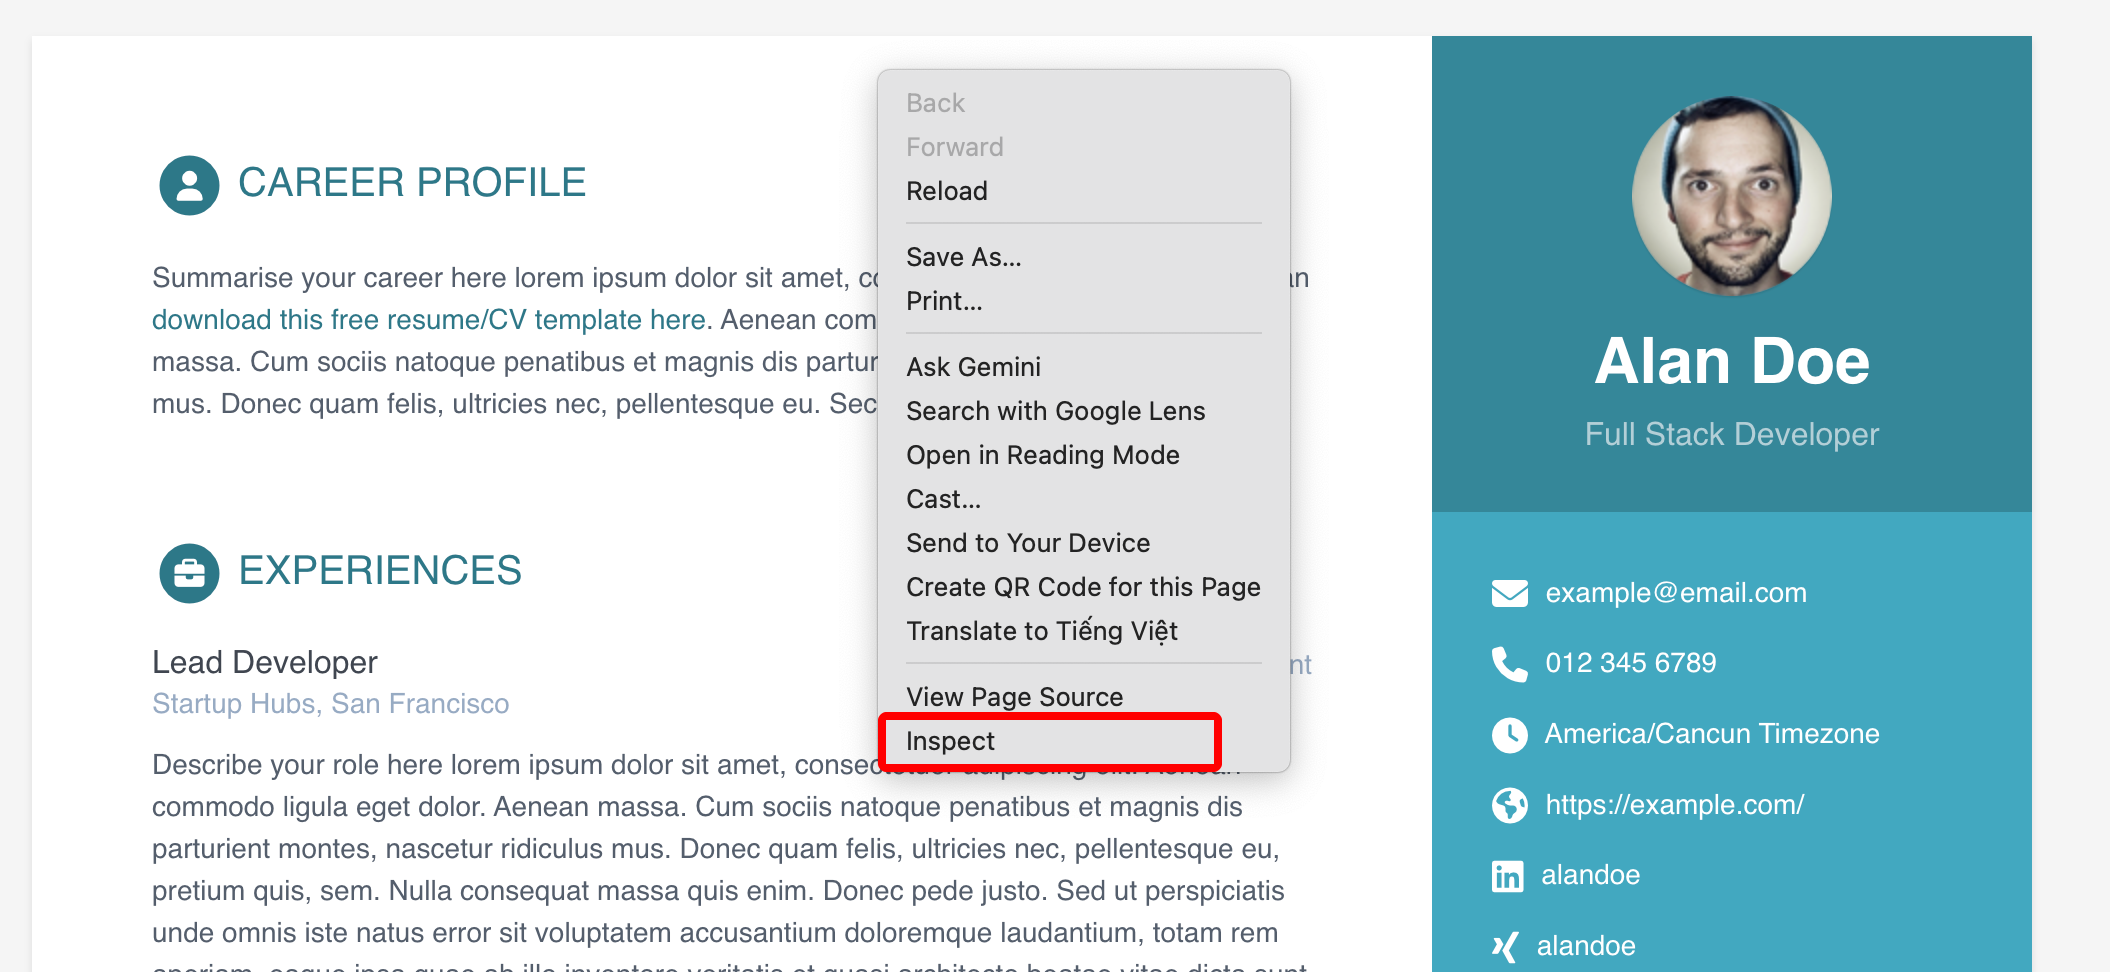
Hãy thử mở Live Demo trên (Right Mouse => Inspect => Devices):
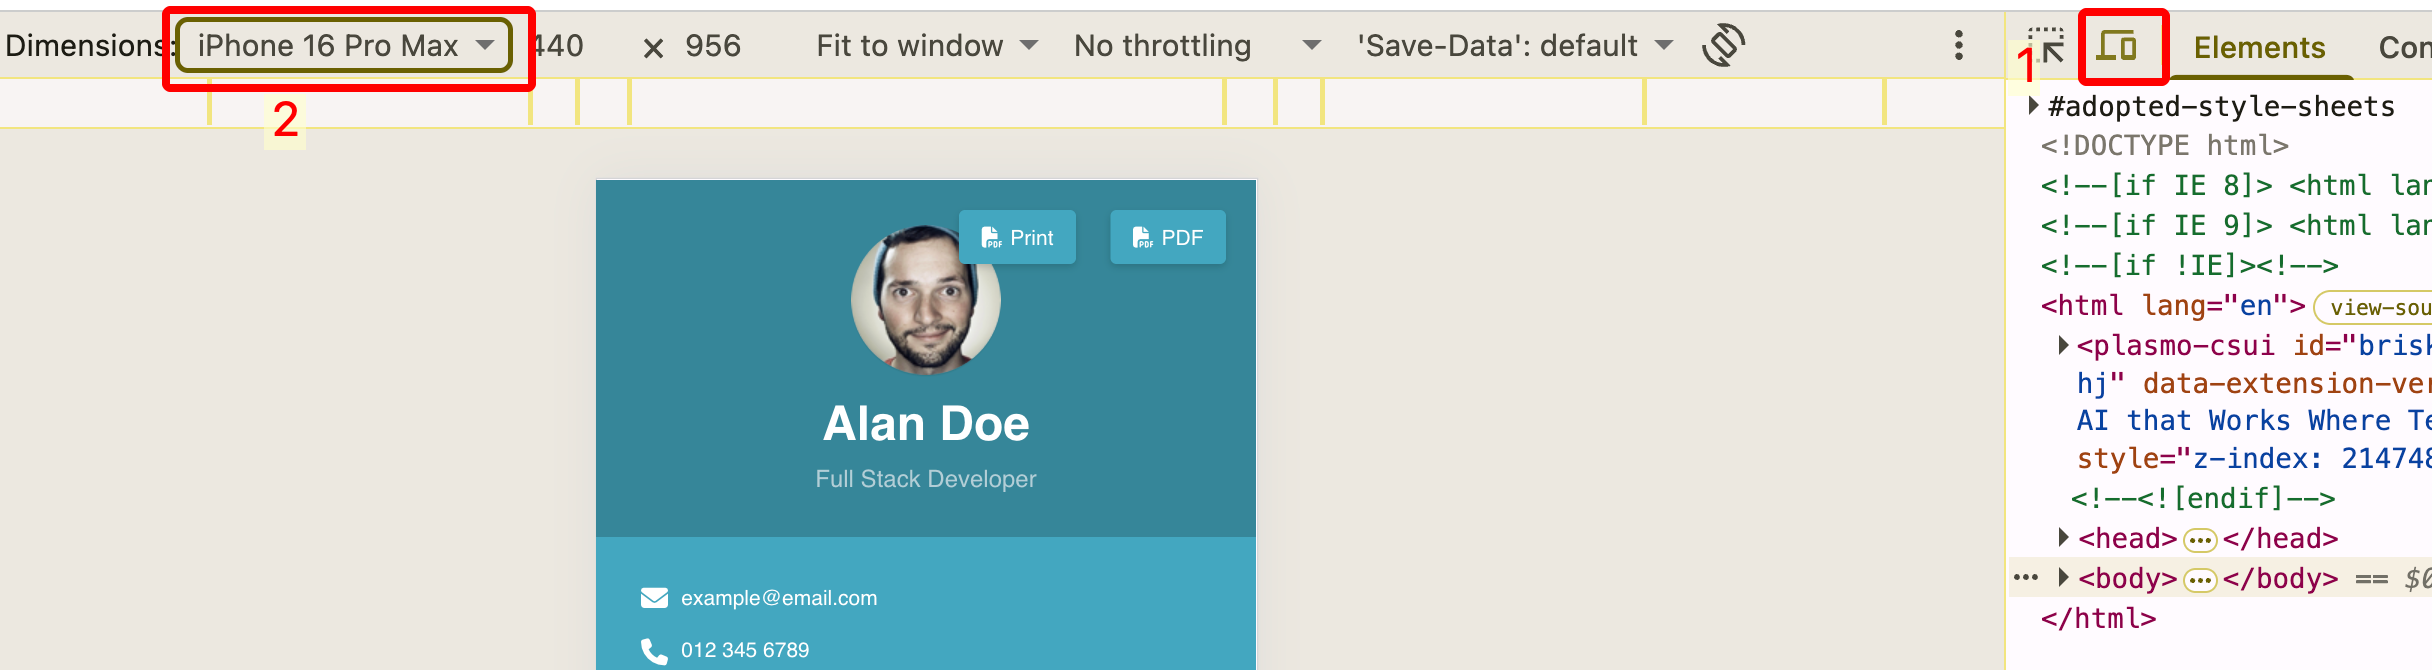
Không phải template nào có giao diện đẹp cũng phù hợp với workshop.
Ưu tiên template có: Jekyll + GitHub + GitHub Pages
Ví dụ Resume Template được mô tả trực tiếp là một Jekyll + GitHub Pages powered resume template.
Sau khi chọn template, tìm nút:
1
Get [Theme Name] on GitHub
hoặc:
1
GitHub
Ví dụ với Online CV, trang theme cung cấp liên kết đến GitHub repository của template.
Click vào GitHub repository.
Repository thường chứa source code của template. https://jekyllthemes.io/free
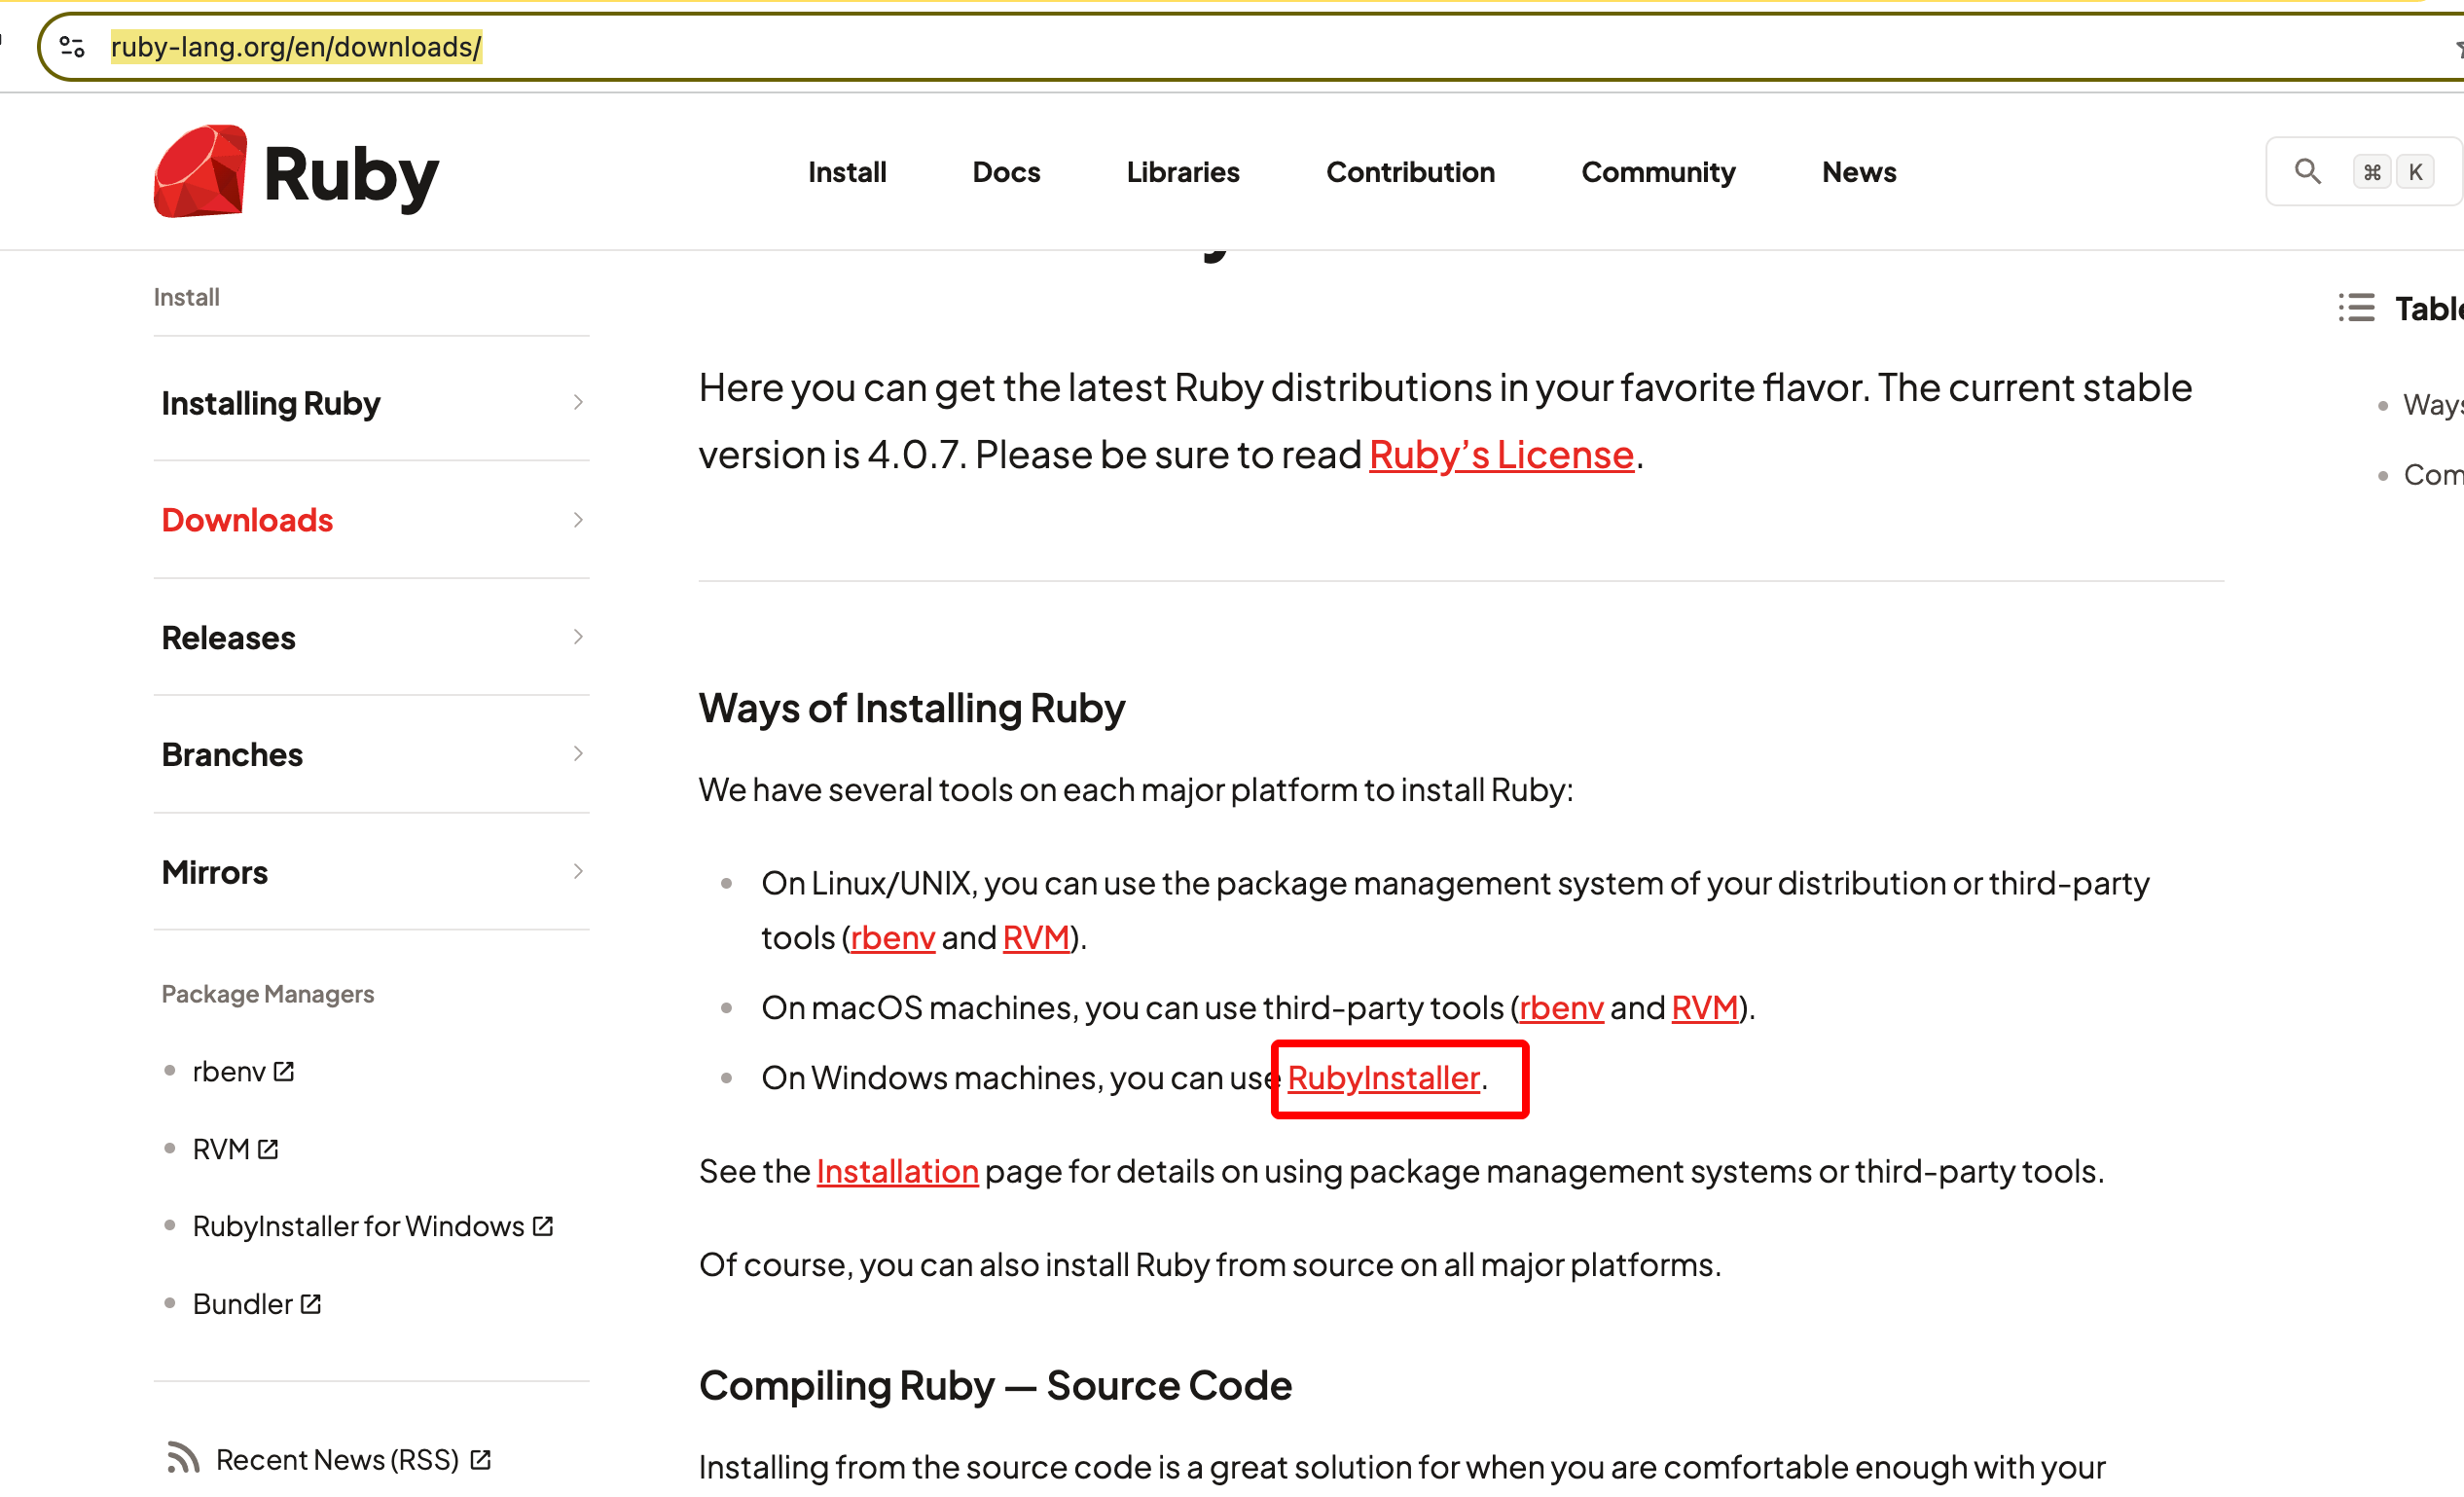
Cài đặt môi trường cần thiết để chạy Jekyll trên máy tính.
Download (https://www.ruby-lang.org/en/downloads/)
Mở Terminal hoặc Command Prompt và chạy:
1
ruby --version
Ví dụ:
1
ruby x.x.x
Kiểm tra RubyGems:
1
gem --version
Kiểm tra Bundler:
1
bundle --version
Nếu Bundler chưa được cài đặt:
1
gem install bundler
Kiểm tra Jekyll:
1
jekyll --version
Nếu Jekyll chưa được cài đặt:
1
gem install jekyll
Nếu gặp lỗi khi cài Ruby/Jekyll, hãy kiểm tra phiên bản Ruby mà template yêu cầu trong:
1
2
3
Gemfile
README.md
.github/workflows/
Không nên tự ý thay đổi phiên bản Ruby của project nếu chưa kiểm tra compatibility.
Download source code của template về máy để bắt đầu customize.
Sử dụng:
1
git clone <TEMPLATE_URL>
Ví dụ:
1
git clone https://github.com/sharu725/online-cv
Di chuyển vào project:
1
cd online-cv
Kiểm tra files:
1
ls
Trên Windows có thể sử dụng:
dir
Bạn có thể thấy:
1
2
3
4
5
6
7
_config.yml
Gemfile
_layouts
_includes
assets
index.md
README.md
Cài đặt các Ruby gems mà project yêu cầu.
Trong project directory, chạy:
1
bundle install
Bundler sẽ đọc:
1
Gemfile
và cài đặt các dependencies cần thiết.
Gemfile chứa danh sách các Ruby dependencies của project.
Ví dụ:
1
2
gem "jekyll"
gem "jekyll-seo-tag"
Bạn không cần thay đổi Gemfile nếu template đã hoạt động bình thường.
Chạy website trên máy tính trước khi deploy lên GitHub.
Sử dụng:
1
bundle exec jekyll serve
Nếu chạy thành công, terminal sẽ hiển thị địa chỉ tương tự:
1
Server address: http://127.0.0.1:4000/
Mở trình duyệt:
1
http://localhost:4000
Development Workflow
Trong quá trình customize:
Nên kiểm tra website local trước khi push code lên GitHub.
Stop Jekyll Server
Trong Terminal:
1
Ctrl + C
Một Jekyll CV project thường có cấu trúc tương tự:
1
2
3
4
5
6
7
8
9
jekyll-cv/
├── _config.yml
├── _data/
├── _includes/
├── _layouts/
├── assets/
├── index.md
├── Gemfile
└── README.md
_config.ymlChứa configuration của Jekyll website.
Ví dụ:
1
2
3
title: My CV
description: Personal CV Website
url: "https://username.github.io"
Update sau khi dang ky GitHub Page
_data/Chứa structured data.
Ví dụ:
1
2
3
4
5
6
_data/
├── profile.yml
├── education.yml
├── experience.yml
├── skills.yml
└── projects.yml
Đây thường là nơi bạn thay đổi nội dung CV.
_layouts/Chứa các layout của website.
Ví dụ:
1
2
3
_layouts/
├── default.html
└── cv.html
Layout xác định cấu trúc chung của page.
_includes/Chứa các component HTML/Liquid có thể tái sử dụng.
Ví dụ:
1
2
3
4
5
6
_includes/
├── header.html
├── about.html
├── education.html
├── experience.html
└── projects.html
assets/Chứa các static assets:
1
2
3
4
assets/
├── css/
├── js/
└── images/
Đây thường là nơi bạn customize:
GemfileChứa Ruby dependencies của project.
Thay thông tin mẫu trong template bằng thông tin cá nhân.
Vị trí chính xác của file phụ thuộc vào template bạn sử dụng.
Nếu template sử dụng _data/data.yml, mở:
1
_data/data.yml
Ví dụ:
1
2
3
4
5
6
7
8
9
10
11
12
13
14
15
16
17
18
19
20
21
22
23
24
25
26
27
28
29
30
position: right # position of the sidebar : left or right
  about: True # set to False or comment line if you want to remove the "how to use?" in the sidebar
  education: True # set to False if you want education in main section instead of in sidebar

  # Profile information
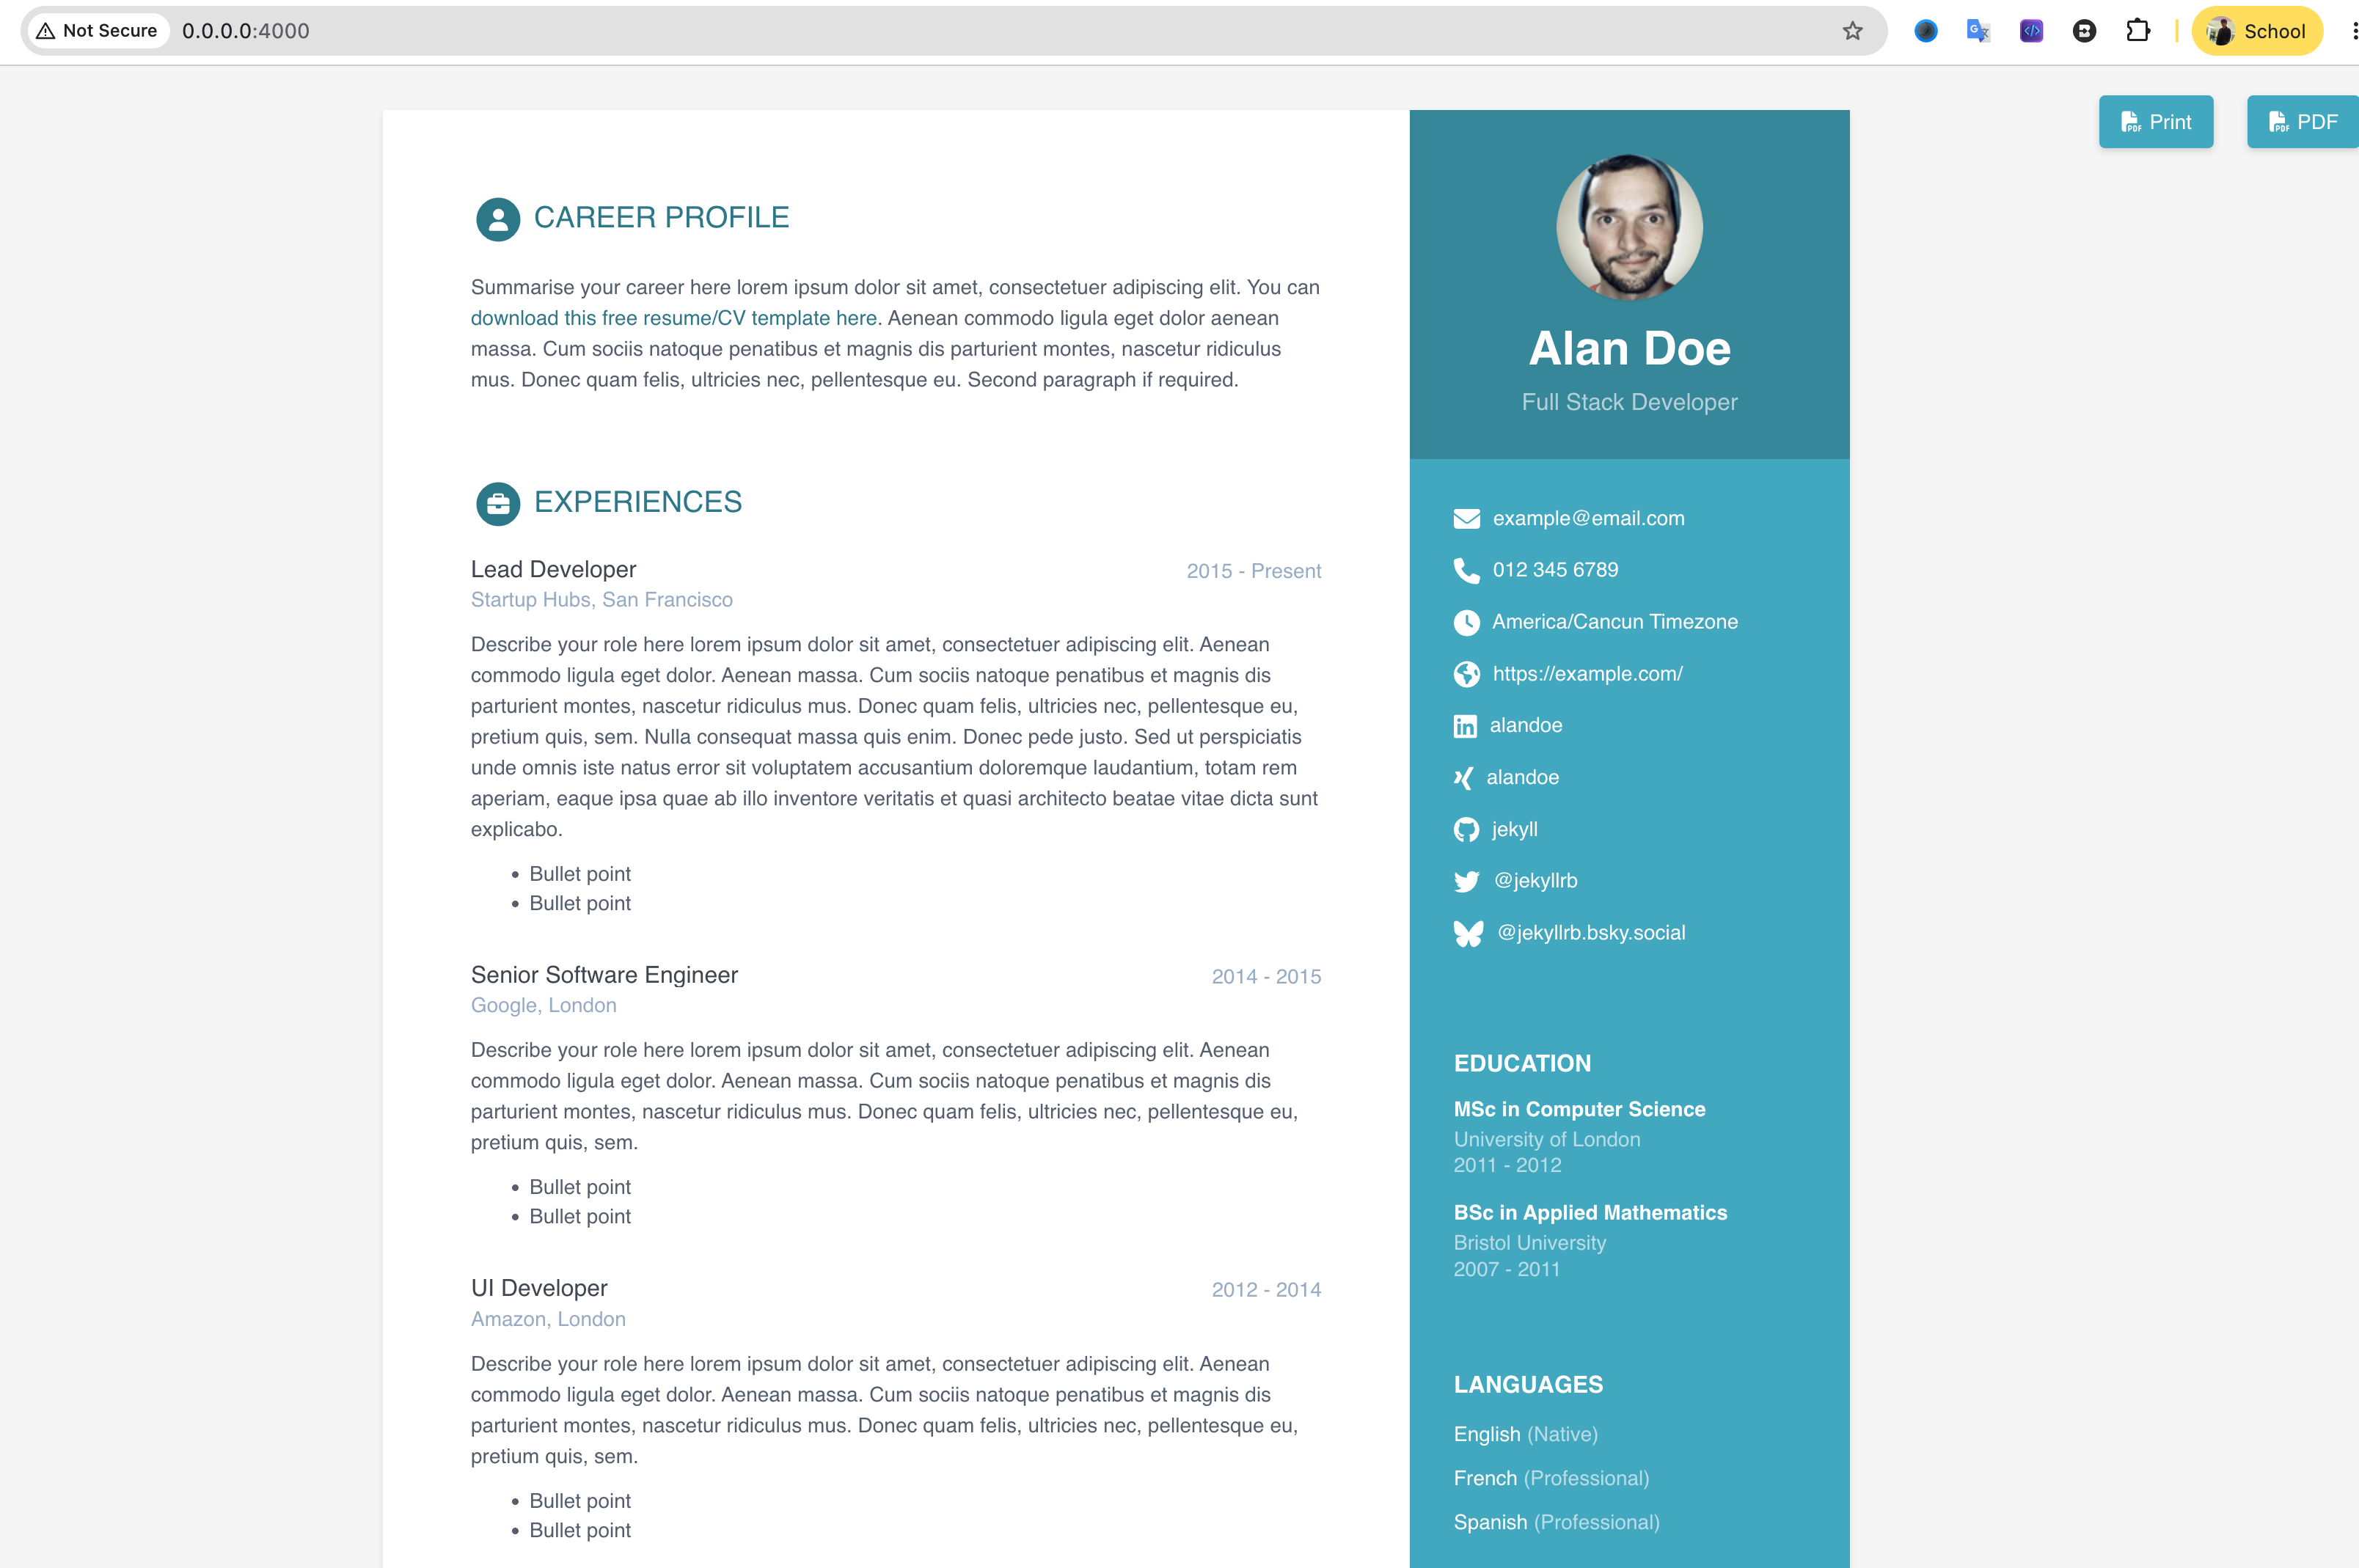
  name: Alan Doe
  tagline: Full Stack Developer
  avatar: profile.png #place a 100x100 picture inside /assets/images/ folder and provide the name of the file below

  # Sidebar links
  email: example@email.com
  phone: 012 345 6789
  timezone: America/Cancun # Enter your timezone, e.g., America/Havana, Africa/Casablanca, America/North_Dakota/Center
  citizenship:
  website: https://example.com/ # Include the full website URL, including "http://" or "https://".
  linkedin: alandoe
  xing: alandoe
  github: jekyll
  telegram: # add your nickname without '@' sign
  gitlab:
  bitbucket:
  bluesky: '@jekyllrb.bsky.social' # Specify your full Bluesky handle
  twitter: '@jekyllrb'
  stack-overflow: # Number/Username, e.g. 123456/alandoe
  codewars:
  goodreads: # Number-Username, e.g. 123456-alandoe
  mastodon: # Please include your full Mastodon link here.
  hackerrank: # Please provide your HackerRank username.
  leetcode: # Please provide your LeetCode username.
  pdf: # Add a PDF link here if you want to include a PDF custom version in your resume.
Thay bằng thông tin của bạn. Nếu trường nào không muốn đưa thông tin thì set value là empty
Liệt kê các technical skills liên quan đến vị trí bạn muốn ứng tuyển.
Ví dụ:
1
2
3
4
5
- career-profile: ...
- education: ...
- experiences: ...
- certifications: ...
- projects: ...
Nên ưu tiên:
1
Skills relevant to target position
Hiểu cách Jekyll lấy dữ liệu và đưa vào HTML.
Ví dụ YAML:
1
name: Nguyen Van A
Liquid:
1
<h1>{{ site.data.profile.name }}</h1>
Output HTML:
1
<h1>Nguyen Van A</h1>
Liquid sử dụng:
1
{{ variable }}
Ví dụ:
1
{{ site.title }}
Có thể sử dụng loop để render danh sách:
1
2
3
{% for skill in site.data.skills %}
    <li>{{ skill }}</li>
{% endfor %}
Có thể kiểm tra điều kiện:
1
2
3
4
5
{% if site.data.profile.github %}
    <a href="https://github.com/{{ site.data.profile.github }}">
        GitHub
    </a>
{% endif %}
Sau khi hoàn thành nội dung, bạn có thể thay đổi giao diện template.
Có ba khu vực chính:
Các file cần kiểm tra:
1
2
_layouts/
_includes/
Ví dụ:
1
2
<h1>{{ site.data.profile.name }}</h1>
<h2>{{ site.data.profile.title }}</h2>
Bạn có thể thay đổi:
Tìm CSS files trong:
1
assets/css/
Ví dụ:
1
2
3
4
5
6
7
.profile-name {
    font-size: 42px;
}

.section-title {
    font-size: 24px;
}
Bạn có thể thay đổi:
Nếu template hỗ trợ profile image, thường ảnh nằm trong:
1
assets/images/
Ví dụ:
1
assets/images/profile.png
Kiểm tra đường dẫn trong HTML/Liquid trước khi thay đổi tên file.
Trước khi deploy, chạy:
1
bundle exec jekyll serve
Mở:
1
http://localhost:4000
Bạn cũng có thể kiểm tra build:
1
bundle exec jekyll build
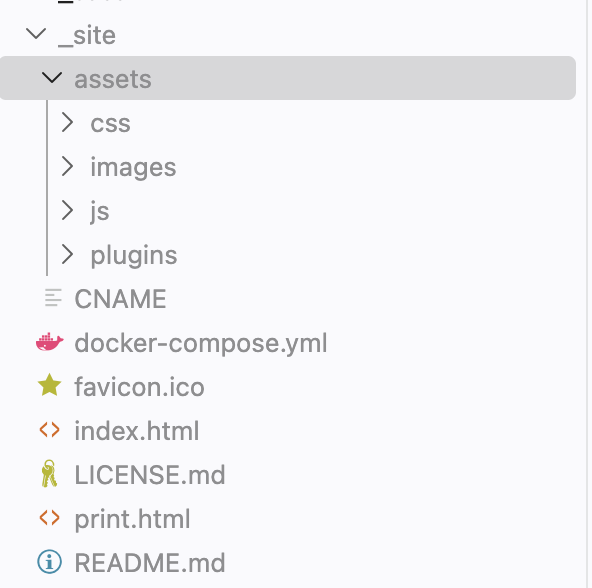
Nếu build thành công, Jekyll sẽ tạo thư mục:
1
_site/
_site/ là static website được Jekyll generate.
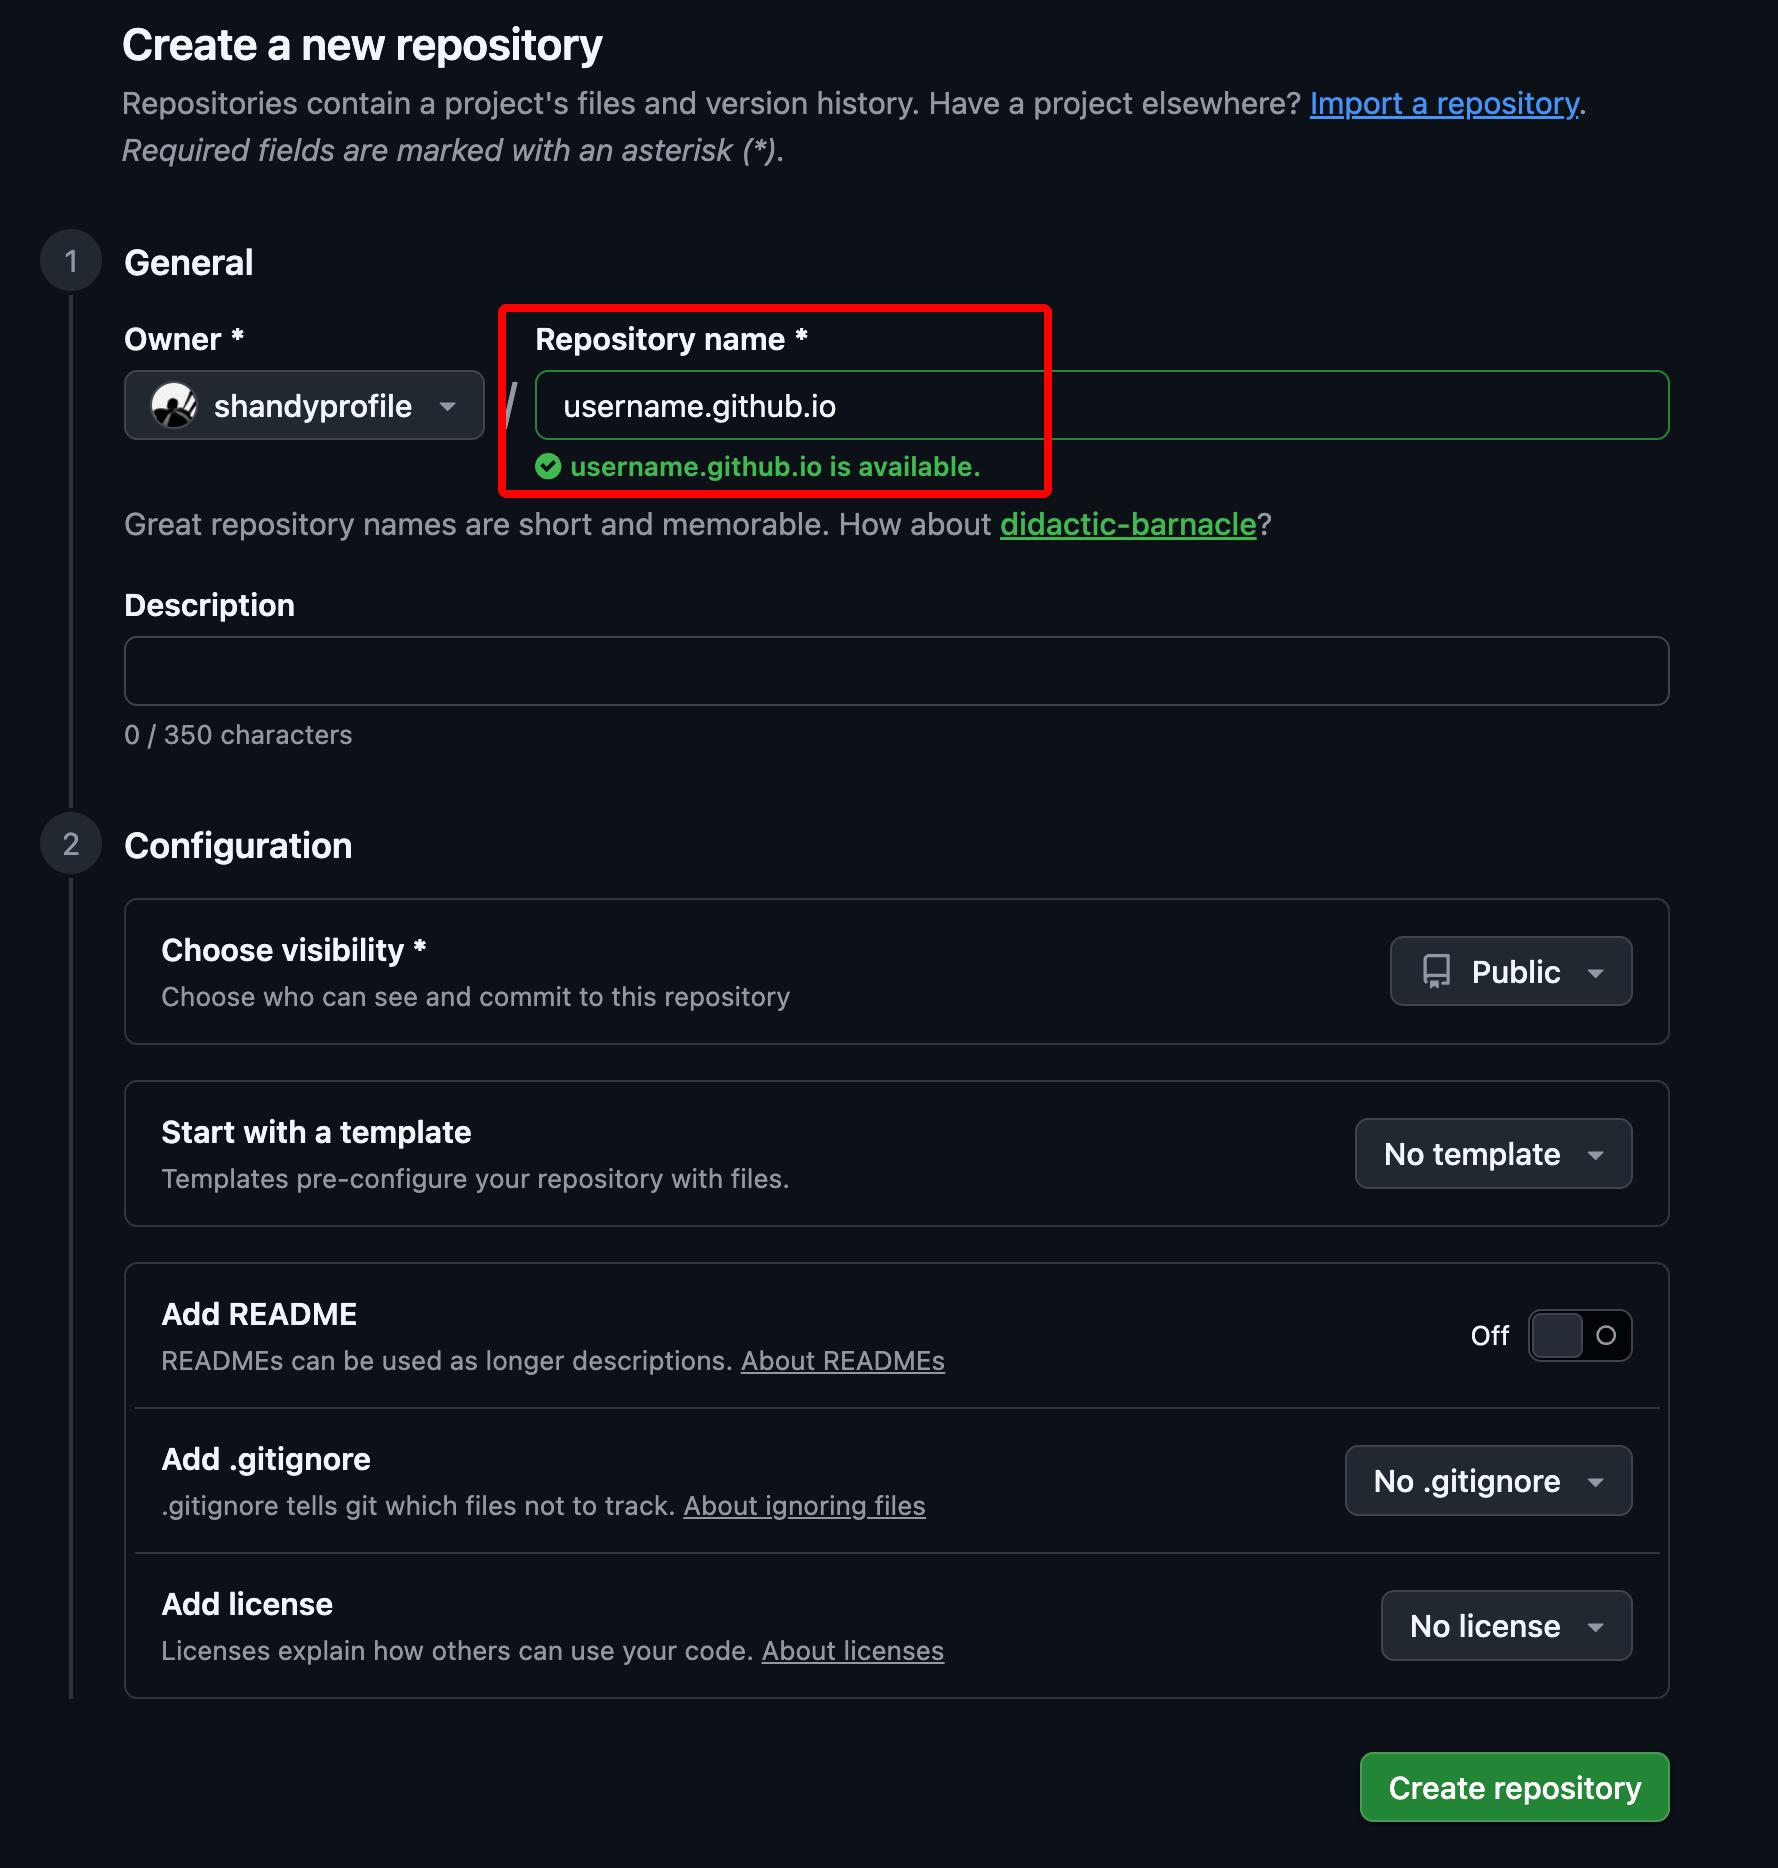
Nếu muốn website có dạng:
1
https://username.github.io
repository nên có tên:
1
username.github.io
Ví dụ GitHub username là:
1
nguyenvana
repository:
1
nguyenvana.github.io
Trong project:
1
git init
Kiểm tra:
1
git status
Add Files
1
git add .
Commit
1
git commit -m "Create personal CV website"
Thêm GitHub repository:
1
git remote add origin https://github.com/username/username.github.io.git
Kiểm tra:
1
git remote -v
Đặt branch:
1
git branch -M main
Push:
1
git push -u origin main
Sau khi push thành công, source code sẽ xuất hiện trên GitHub repository.
Vào repository: Settings => Pages
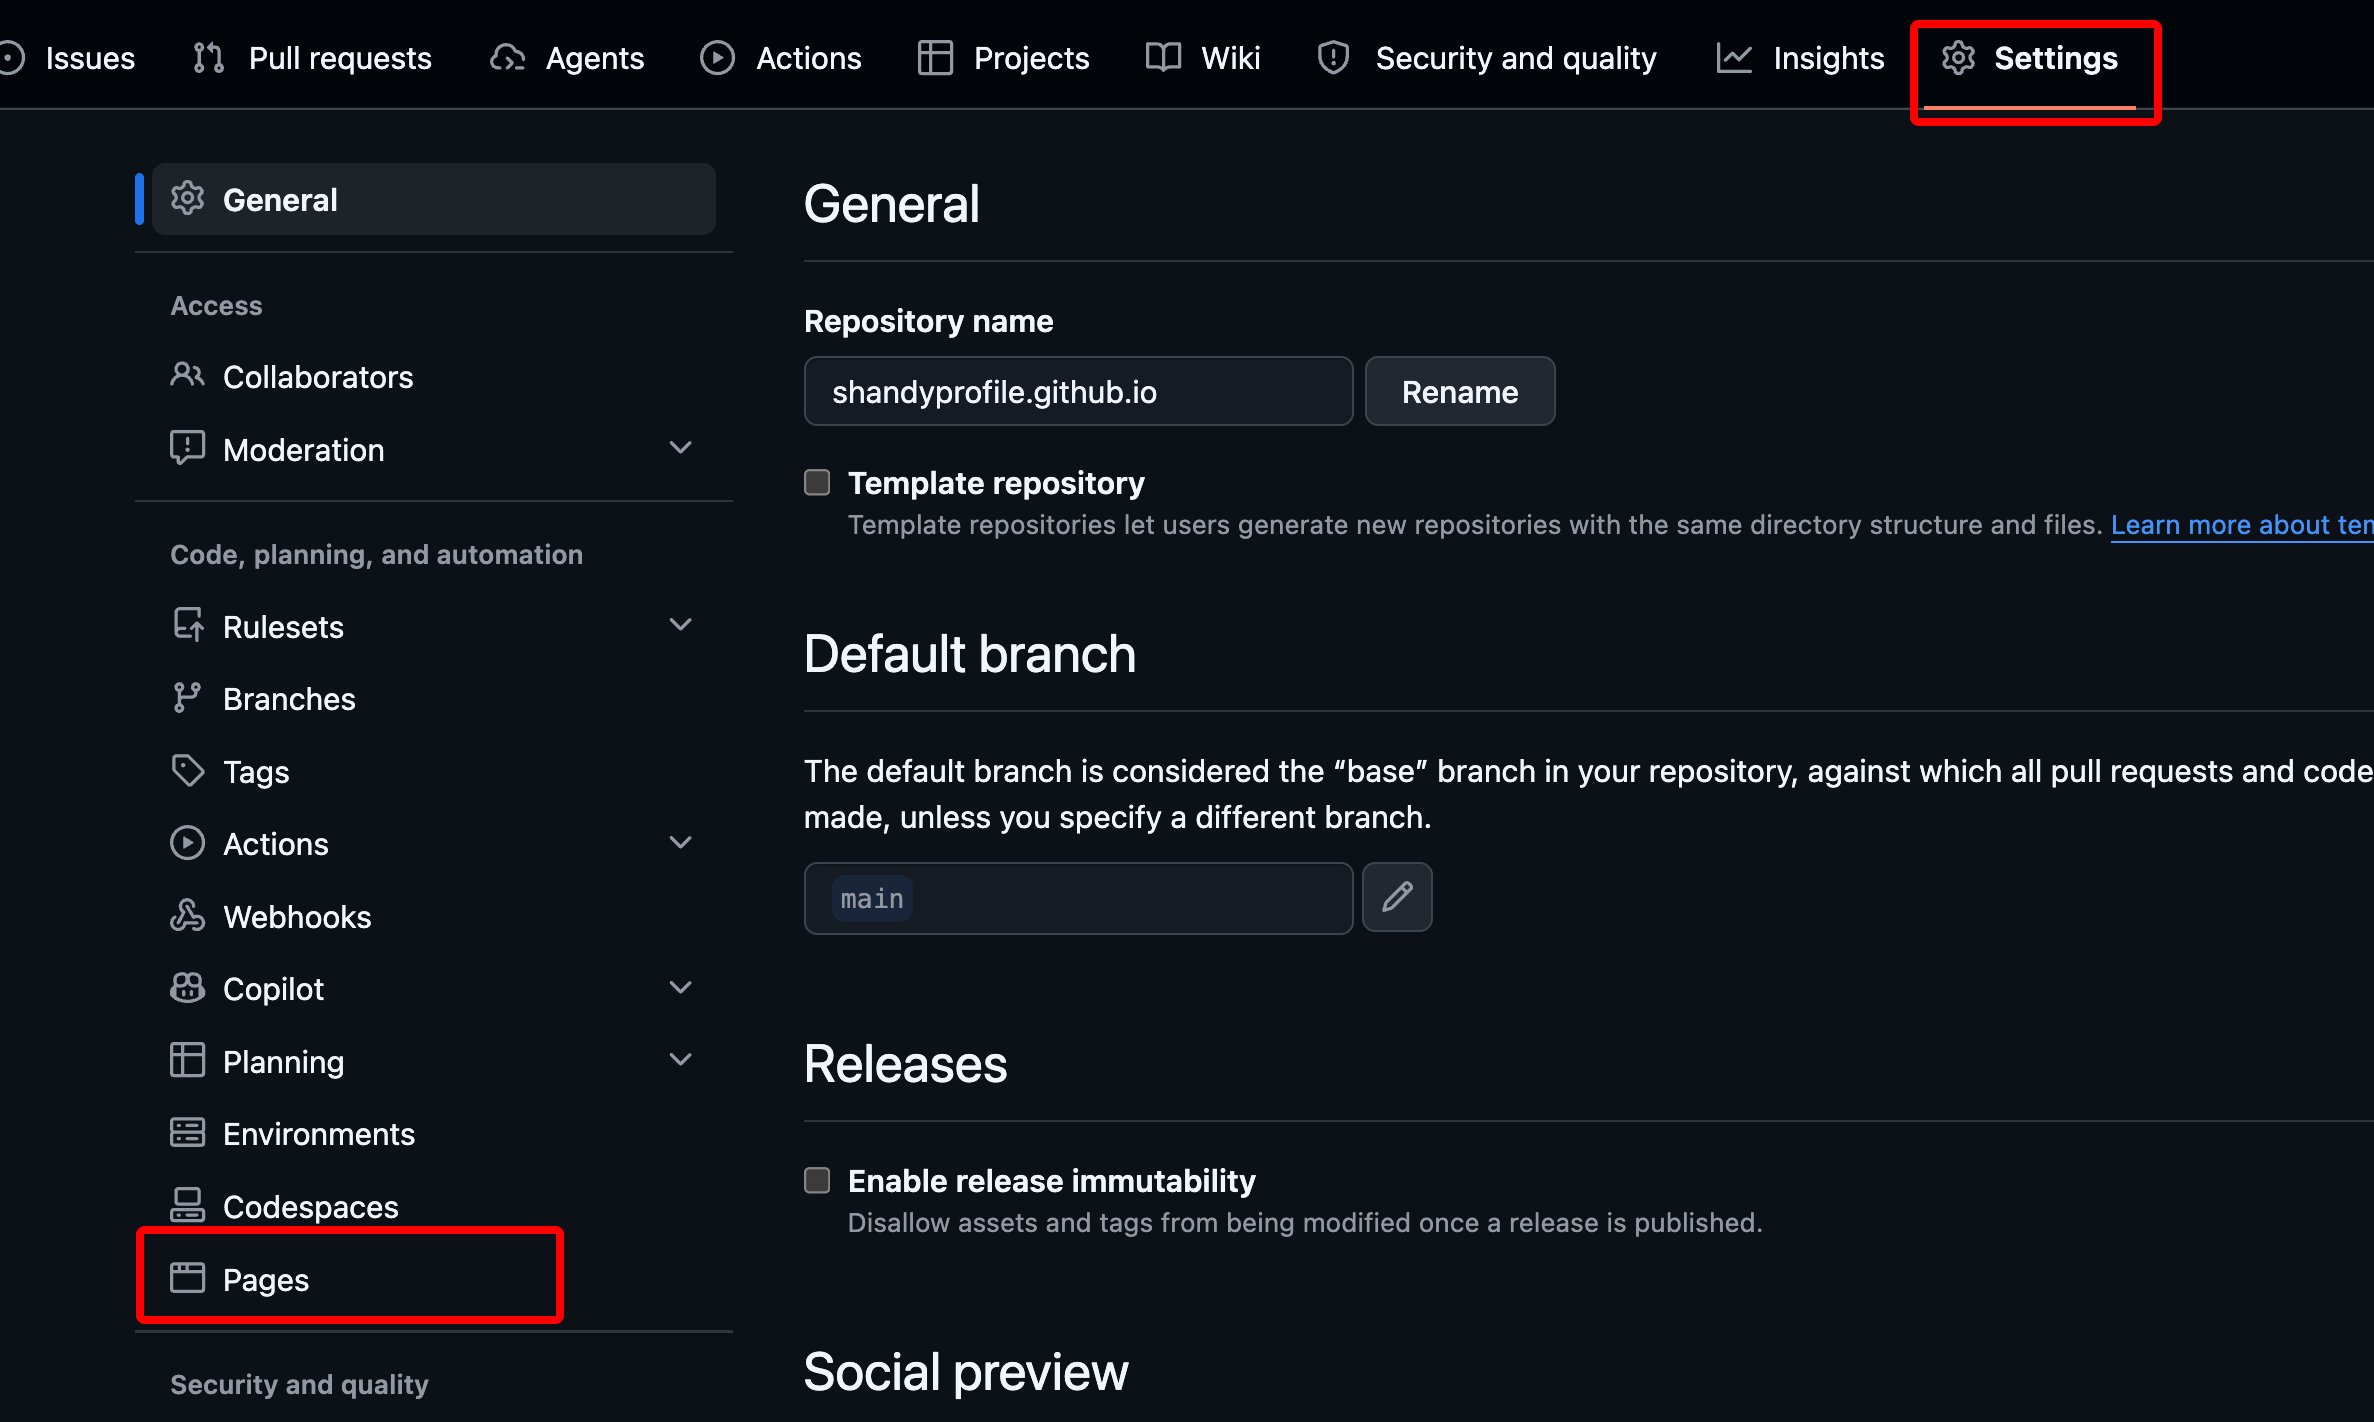
Chọn phương thức deployment phù hợp với workflow của project.
Nếu sử dụng GitHub Actions:
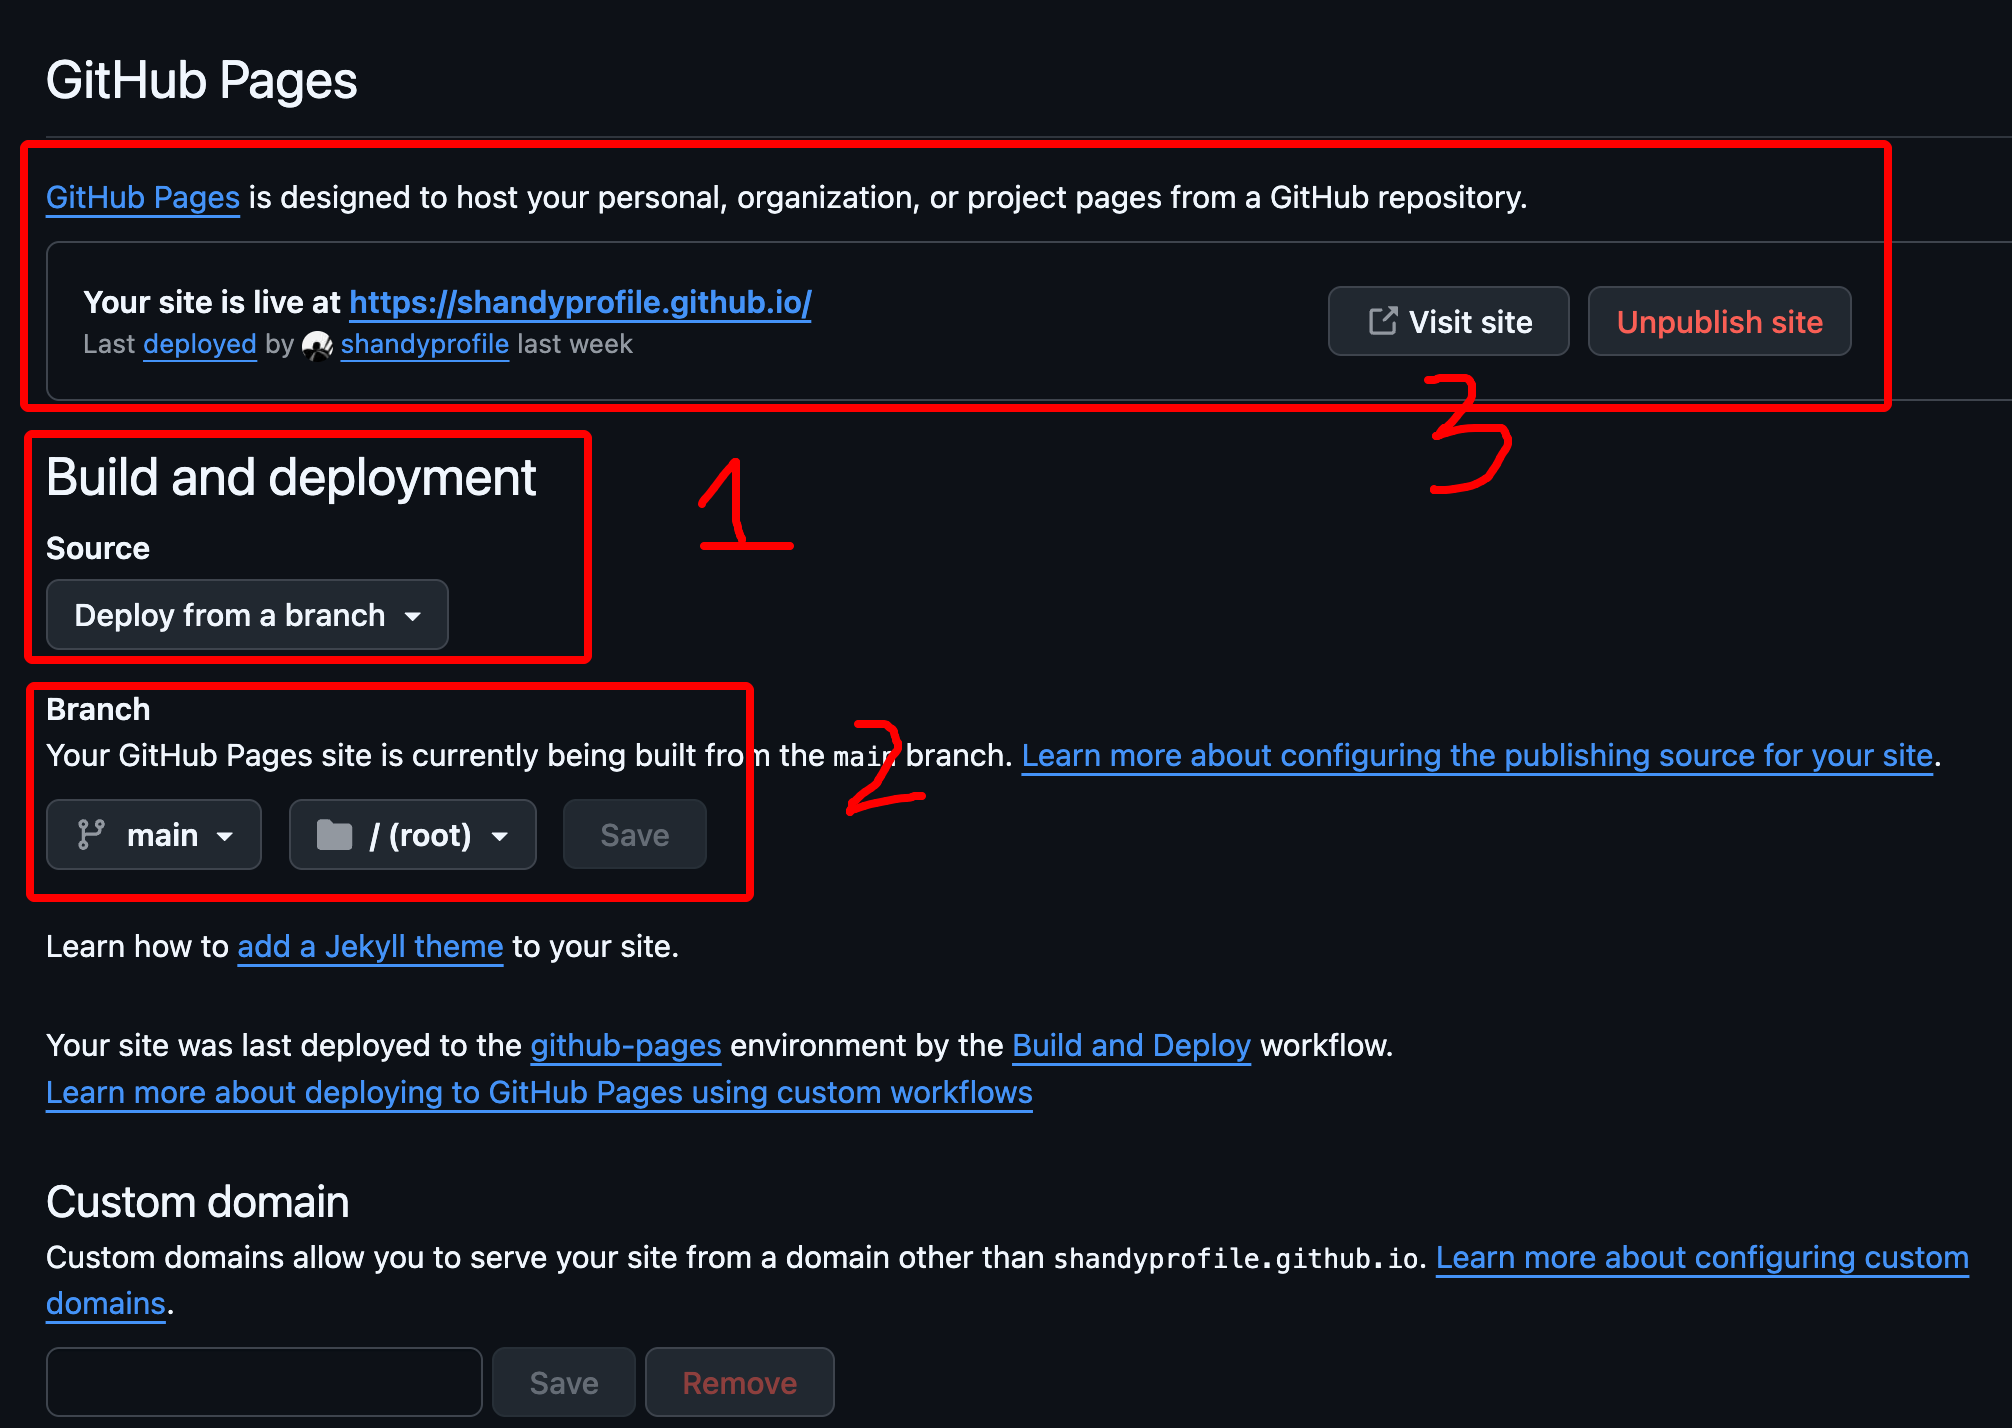
Sau khi workflow chạy thành công, website sẽ được publish.
URL thường có dạng:
1
https://username.github.io
Tự động build và deploy website mỗi khi bạn push code.
Workflow:
GitHub Actions workflow thường nằm trong:
1
.github/workflows/
Ví dụ:
1
2
3
.github/
└── workflows/
    └── jekyll.yml
1
2
3
4
5
6
7
8
9
10
11
12
13
14
15
16
17
18
19
20
21
22
23
24
25
26
27
28
29
30
31
32
33
34
35
36
37
38
name: Deploy Jekyll

on:
  push:
    branches:
      - main

jobs:
  build:
    runs-on: ubuntu-latest

    steps:
      - uses: actions/checkout@v4

      - uses: ruby/setup-ruby@v1
        with:
          ruby-version: '3.3'
          bundler-cache: true

      - run: bundle exec jekyll build

      - uses: actions/upload-pages-artifact@v3
        with:
          path: ./_site

  deploy:
    needs: build
    runs-on: ubuntu-latest

    permissions:
      pages: write
      id-token: write

    environment:
      name: github-pages

    steps:
      - uses: actions/deploy-pages@v4
Lưu ý: Workflow có thể khác nhau tùy template và phiên bản Jekyll/Ruby. Nếu template đã cung cấp workflow, nên sử dụng workflow của template trước khi tự thay đổi.
Sau khi website đã được deploy, quy trình cập nhật CV rất đơn giản.
Ví dụ:
1
2
_data/data.yml
_data/projects.yml
1
bundle exec jekyll serve
1
2
git add .
git commit -m "Update CV"
1
git push
- Bạn không cần upload HTML thủ công lên server.
- Các bước này không cần phải trực tiếp build và deploy.
- Các bạn chỉ cần quan sát quá trình build và deploy tại Action trên GitHub
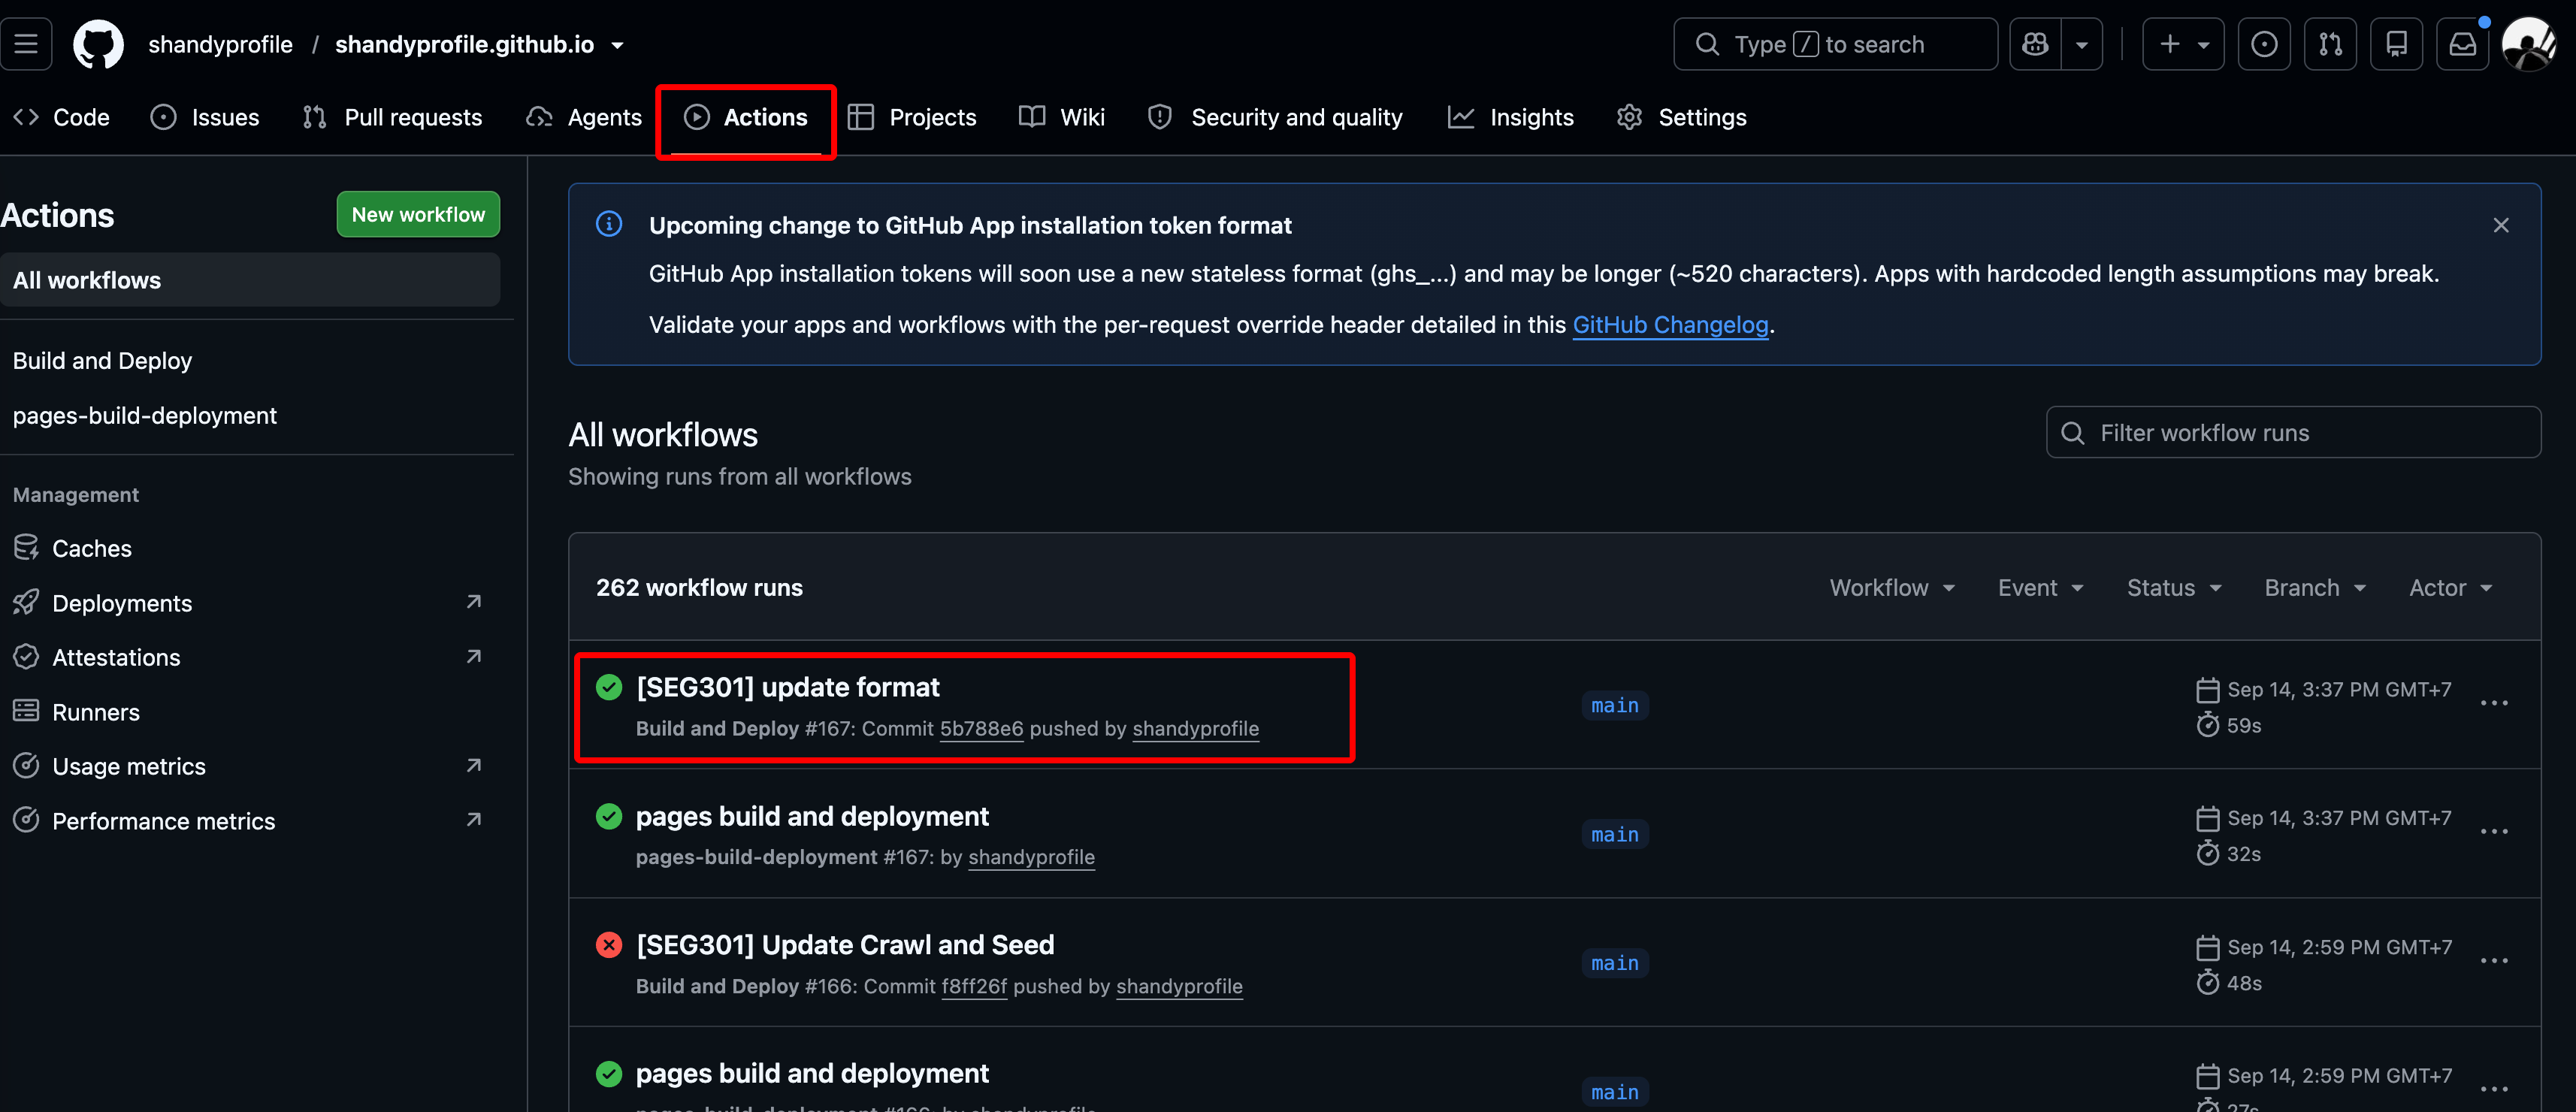
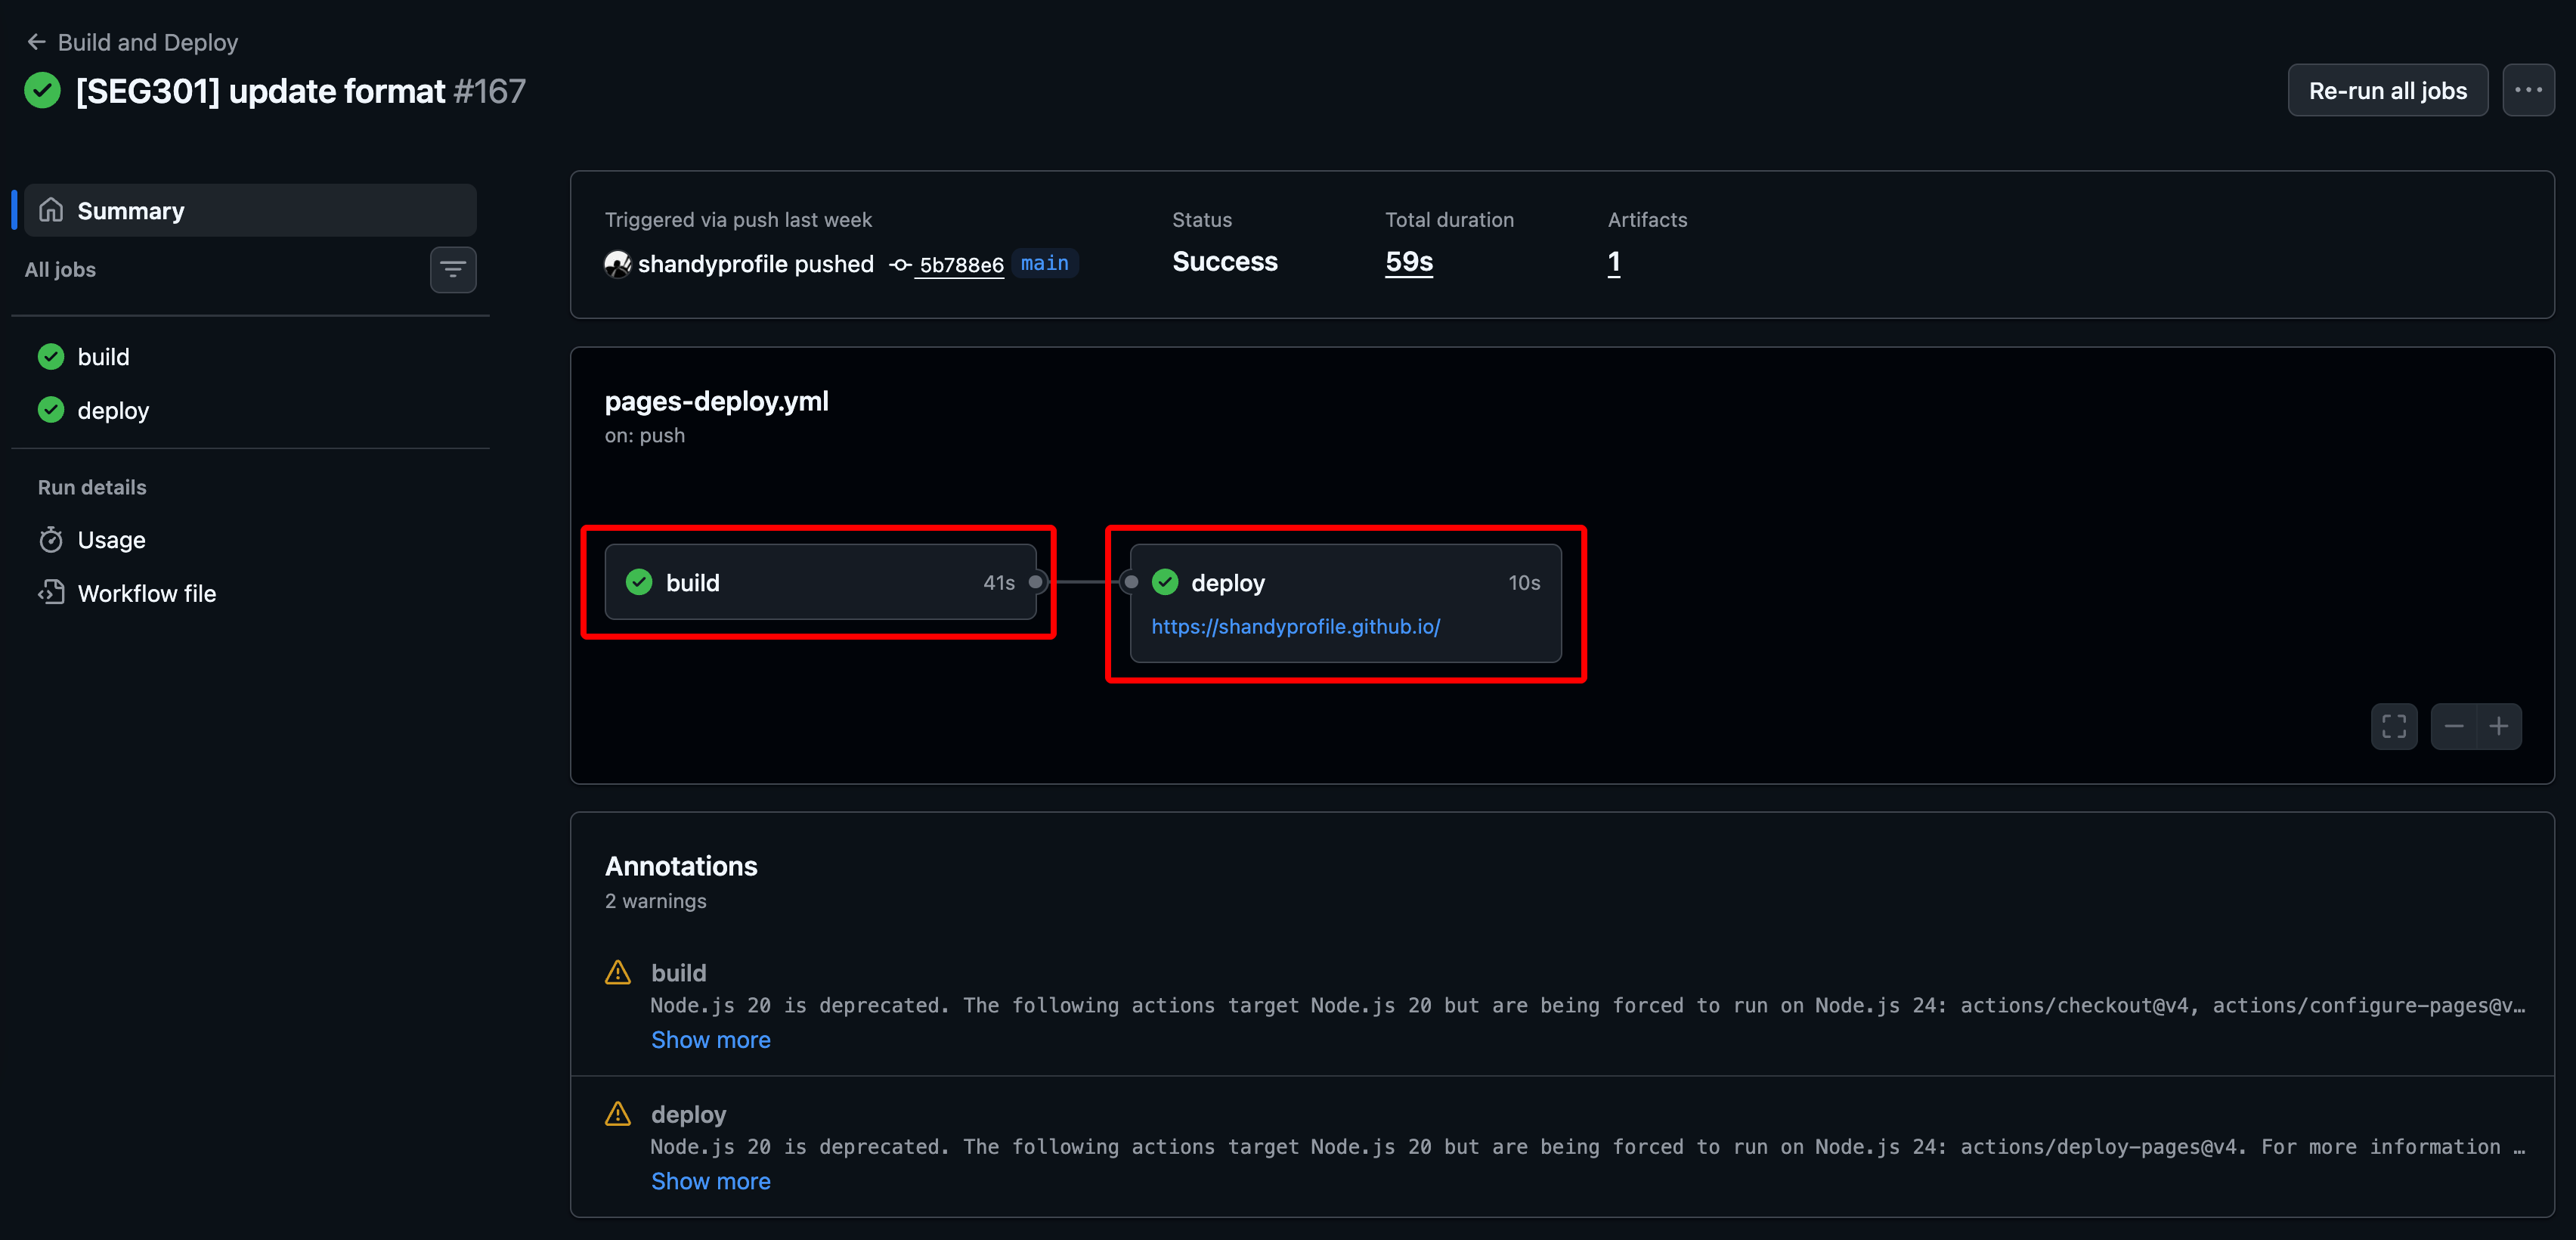
Good luck. :D